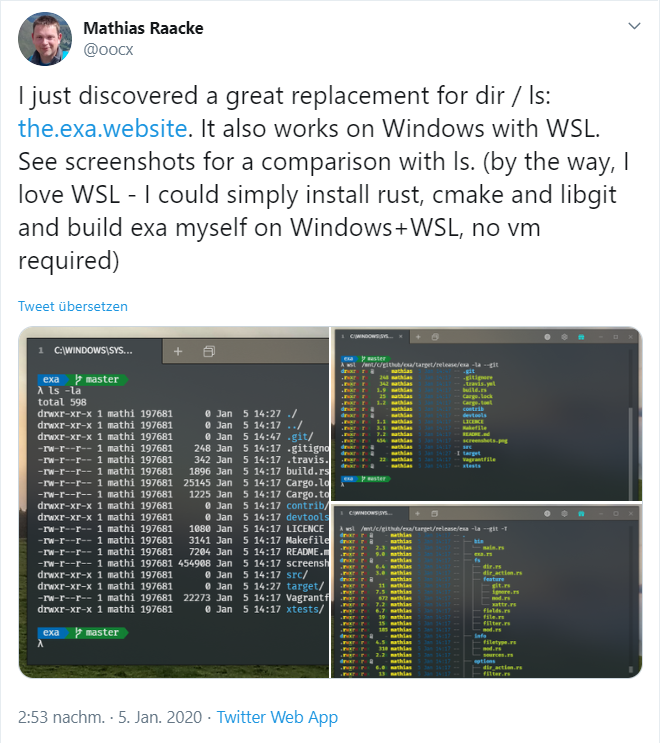
Recently, I was pointed to exa by this tweet from Mathias.
The installation is pretty easy. Unless you are using Ubuntu (as WSL) as there is no package available. But then again, compiling it by yourself is pretty straightforward as well.
1. Download and install Rust for your platform.
2. Install libgit2 and cmake.
3. To download the latest version, run: git clone https://github.com/ogham/exa.git
4. Run make install in the new directory to compile and install exa into /usr/local/bin.
As you might know, I am using Ansible to install all of my WSL instances. Eventually, things did turn out not so easy. However, two evenings later, I finished an Ansible role doing this fully automated.
Eventually, you have to set the variables for exa_dir and rust_dir to make this role working. That way, you not only get a great tool, but you also get it fully automated into your Ubuntu WSL.
After we talked a lot about it in our podcast, I finally started with my “Automation of the Home Automation” project.
What I’ve done so far: Set up a Raspi 4 with Ubuntu Server, fully provisioned using Ansible. Also, it seems, the Kernel bug causing USB devices to fail on the 4 GB version of the Raspi 4 seams to be removed with the most recent binaries available.
Deployed MQTT, InfluxDB, Telegraf and Node-Red on Docker containers using Ansible.
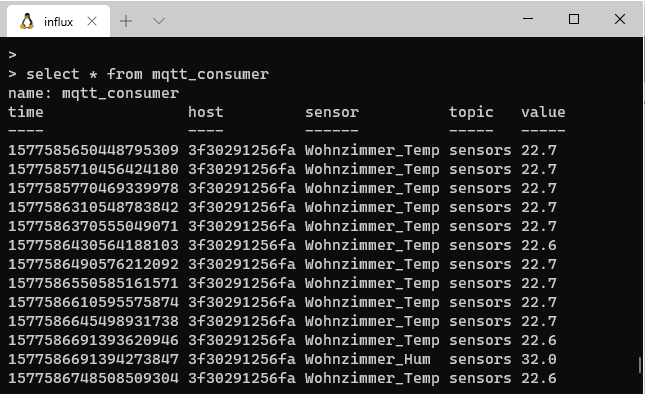
Wrote my very first Node-Red flow to get data into the broker and the database:
The data is read from my EZcontrol XS1, which became surprisingly easy using Node-Red.
The EZcontrol XS1 integration for Home Assistant allows you to observe and control devices configured on the XS1 Gateway. Please have a look at the official docs for using this gateway.
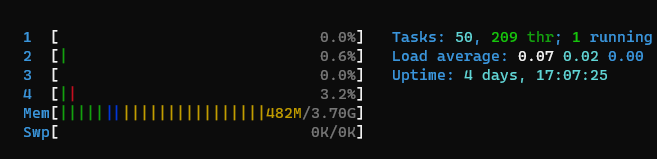
While I was not sure about the available resources on the Raspberry, it seems there is plenty of space (RAM, CPU) left on the device.
On the other side, using Ansible I will be able to deploy services to other (more) nodes once necessary.
Also, I realized some issues with Ansible on Ubuntu running on the Raspi and Python. Therefore, I made sure Python 2.7 is entirely uninstalled. Instead, I made sure my inventory file is set to use Python 3 on the target system.
There have been some other issues, I came along, especially because for various bits OI was looking for there are no ARM aarch64 releases available. Also, the official Docker images I used do not support Apline on ARM v8 / aarch64 as Alpine seems not to support this target architecture, yet.
As I use multiple Windows machines, all running the identical setup of WSL (Ubunto) I wanted to keep all these instances automatically updated.
I am using Ansible scripts to set up the WSL. While all the files are hosted on the file system (\mtn\c\…) I can throw away a WSL instance and create a new one within minutes.
While many packages are not available on Ubunto 18.04 LTS, I created a small Ansible task upgrading my WSL to the latest Ubuntu version available.
Start your WSL instance the very first time and run sudo apt-get update
Install ansible by running sudo apt-get install ansible
Make sure the Ansible scripts are located on the host system (e.g. c:\dev\…)
Start your WSL instance and change e.g. to /mnt/c/dev
Run your Ansible playbook as sudo
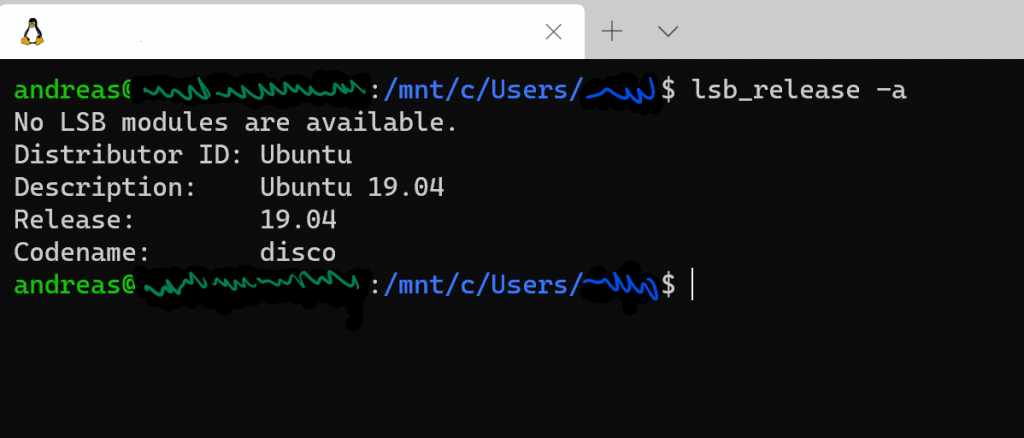
You can check your dist version with lsb_release -a:
No LSB modules are available.
Distributor ID: Ubuntu
Description:    Ubuntu 19.04
Release:        19.04
Codename:       disco
As we discussed in our podcast, I am working on reducing my social media footprint. While I use Twitter quite a lot for communicating, it is almost not possible to find information on my Twitter feed once I am looking for it.
I was pointed to Amnesia, a small Python script using the Twitter API, deleting old tweets and likes. The goal is to run this housekeeping as automated as possible.
Setup
The setup is relatively simple:
Use a Docker container hosting the script
Run the script on a daily base
Deploying the container automatically using Ansible
The Repository
Instead of cloning the repository locally and adding all files manually to the deployment process, we will clone the repository directly to be used by the container. Here we consider two aspects:
We could clone the repository directly into the container. This will leave a minimal footprint on the host but would require to have Git in your container.
We clone the repository to the file system of the host and bind it within the container.
The second aspect will be the source of the repository. If cloned directly from GitHub, it might appear convenient to clone the repository directly from the original master. That way you would always have an up to date version of the script. The drawback here is that you will probably not be aware of any (breaking) changes or malicious code introduced in the repository.
Do use the Amnesia script you will need to sign up for a Twitter developer account.
This process might take 10 to 15 minutes as Twitter introduced a verification and review process. However, when using the personal or happy developer path you will probably end up in an automated enrollment process.
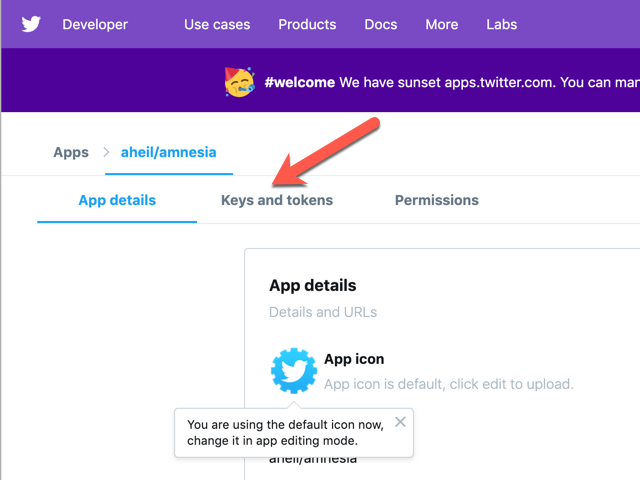
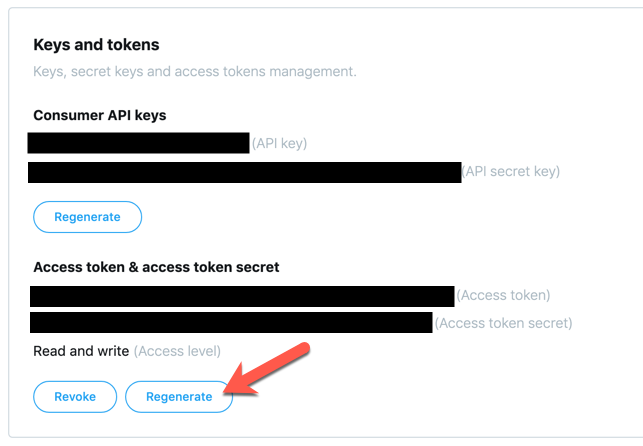
Once enrolled and logged in at the Twitter developer page, under our apps detail page at Keys and tokens you will find the information needed for the Amnesia script later on.
You probably need to click Generate once to obtain a valid access token ad access token secret for your app.
Scheduling the Script
Julien Dubreuil shows how to manage Docker containers using crontab. The pattern provided there can be adapted relatively easily for our needs.
Make sure the file ends with a new line LF character (as required by POSIX systems). Otherwise, cron might end up in refusing to process your crontab file.
The crontab entry will cause the amnesia script to be executed once a day. Also, when executed all log entries will be added to the cron.log.
run-crond.sh
The second file we need is a shell script run-crond.sh to be executed later in the container.
-L will cause crond to log into the file specified, $@ will pass additional parameters to the script (although we are not using any at the moment) and we will tail the log file so we see something in the container log.
The Docker Image
We will create a Docker image for the Amnesia script. Therefore, we have to prepare the Docker image, apply the setup steps for the script and set up the cron jobs specified before.
My first draft (probably not a perfect one) of the Dockerfile for the service looks currently like the following:
First, we install the required packages (python2 and virtualenv) and go through the setup steps for the Amnesia script. Before running pip install I copy the requirements.txt file to be accessed in the container. Afterward all prerequisites for the script are installed. You don’t have to bother about the script itself, as it will be executed by the cron job specified above.
Similar to the requirements.txt file I copy our crontab file to be concatenated to the crontab file. To execute the script file specified before I copy this as well and make it executable.
After creating folders and files for logs the script can be started using the CMD command.
Ther might be better ways to set up the container, however, I have chosen a quite straightforward approach to get the first draft working quickly.
At this point, you could already build and run the container if you clone the Amnesia repository into a folder called repo.
The Secrets
Before we start creating the deployment scripts, we have to take care of our Twitter keys and secrets. I would not recommend to write them down in any configuration files in plain text. As we will use Ansible for the deployment, we can use Ansible Vault to encrypt the sensitive information on our local system. Keys will be then decrypted during the automated deployment process on the target system.
We will use these keys later in the Ansible tasks e.g. when replacing lines in the configuration script:
line: " 'consumer_key': '{{ consumer_key }}',"
When I started with Ansible, it took me quite a while to figure out how to store the encrypted data. The easiest way however is, to copy the encrypted string with all the whitespaces directly into your configuration files.
Automated Deploying
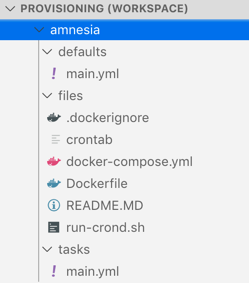
The final step is now to create your ansible script. I am using the recommended directory layout for ansible roles. Therefore, all files we have generated so far are located in a folder called files. The variables with encrypted secrets are located in a file main.yml in the folder defaults while the main.yml containing the script we are creating now lives in a folder called tasks.
The overall structure for this project looks like the following:
The Ansible Script
Usually, I start by creating the directories I need on the server
---

- name: Make sure install directory is present
  file:
    path: "{{ amnesia_install_dir }}"
    state: directory
  tags:
  - amnesia
The directory I use here is stored as variable in the main.yml file in my defaults folder as shown above. Each role on the server gets usually its own directory where I store all uploaded data.
amnesia_install_dir: /opt/amnesia
Very important to keep in mind: Everything in this folder will be overwritten bythe scripts and is autoamtically deployed or generated. Consequently, you shouldn’t store any persistant data in this folder. If this is the case, I use a different location on the server. However, this is nit necessary for this particular role.
We now copy everything from the local files director to the server. That’s the reason I also provide a .dockerignore file in this directory. Everything on the server not needed within the Docker image context can be excluded in this file. This will reduce your image’s footprint. Again, there are other (and maybe better) ways to do so, but this worked for my use case quite well.
In the second step, the GitHub repository (remember, the forked one) is cloned onto the server. As the repository is cloned into a folder called repo. That’s the reason the requirements.txt file was copied from this location in the Dockerfile.
Following the Amnesia instructions, we have to copy the configs-sample.py file for further configuration. Once the file is copied you can modify the settings using the lineinfile task in Ansible.
In the next few tasks, we finish the configuration by setting all the secrets and the duration of tweets. Once the script is executed, all the secrets will be encrypted and deployed on the server automatically.
To make all the script above work we have to bin the directory repo on the host to /var/amnesia as this is used in the container several times to make the files accessible within the container. You can choose any other layout based on your preference, though.
Given you have a Ansible playbook and a host file, you now can deploy the service using
It turned out to be one evening of work to get the container and script done. I had to do some research on some details as well but was able to base on some of my previous Ansible projects.
As long as the Twitter API is not changed (or the developer tokens have benn revoked), this is a quite nice solution to keep my Twitter footprint on a minimal level.
The usage of Docker and Ansible adds a not to undererstimated level of complexity to the overall solution. Without (i.e. you install and run the script on your host) the Amnesia script is installed within a few minutes. However, with the solution provided here, it can be deployed on any of your servers (locally, hosted, virtual etc.) again and again.
While we were publishing the first episode of our Podcast, I came across some issues with WordPress, though.
First of all: We are using the Podlove Publisher and therefore WordPress to host our Podcast.
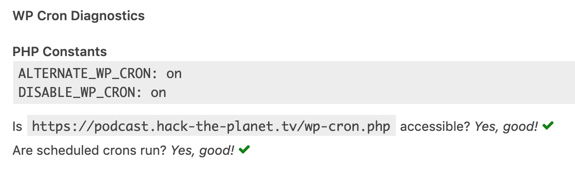
Unfortunately, I encountered an issue with the required cron jobs. The Podlove WP Cron Diagnostics showed, that there was nothing set up.
PHP Constant ALTERNATE_WP_CRON: not definde DISABLE_WP_CRON: not defined
As a result, any attempt to connect to running cron jobs failed. After checking Google I found a helpful hint here. All you have to do is to add
define('ALTERNATE_WP_CRON', true);
in your wp-config.php.
And here the fun begins. I am using the official WordPress Docker container and Ansible to deploy it on my servers. So you need a way to add this line to a wp-config.php file on your server using an Ansible script… I think you get it. Some years ago, you would have simply logged into your server, changed the line in the file and eventually restart your webserver.
Now everything becomes more difficult. First of all I try such things manually. To do so (as well as to verify the changes on the server) I bash into the running WordPress container
docker exec -i -t {containerId} /bin/bash
just to realize there is neither vim or even vi on this container available. Also less did not work. At least I was able to read the file using more.
You can make use of the WORDPRESS_CONFIG_EXTRA environment variable to define any other config values in the wp-config.php file.
With this environmental variable, you can literally add anything to your wp-config.php file in the prebuild WordPress image without fiddling with own containers and so on.
I do some work on my MacBook with macOS, on my Windows laptop with Windows 10 and Ubuntu WSL. I work in Visual Studio Code onWindows while running Ansible scripts in my Ubuntu WSL on the same code base. What could possibly go wrong? While I spent the last few evenings debugging, I completely forgot about the obvious. I should know better, though.
CRLF vs LF
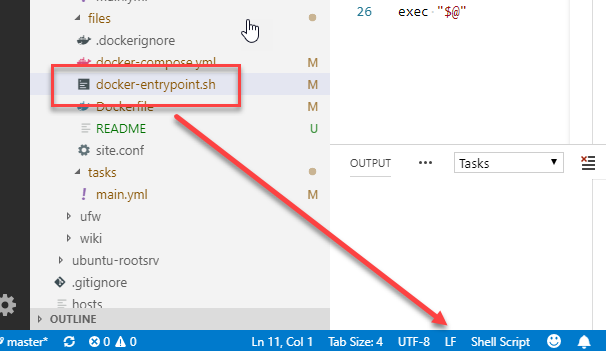
When working on my Windows machine I regular forget about file formats. While in many cases the systems are nowadays very resilient, when creating Docker containers this can end up in a big FUBR. In the likely case, you freshly built container using an entrypoint script tells you during a docker-compose up something like
standard_init_linux.go:xxx: exec user process caused "no such file or directory"
go and check the file format of the entrypoint script and switch to LF. At least Visual Studio Code makes it easy.
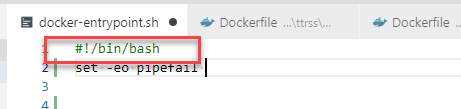
To bash or not to bash
In case you see exactly the same error, check the entrypoint script again. Is it using bash as mine?
Go ahead and make sure bash is installed in your image. Use something like the line below. On a very regular base, I completely forget about installing bash but keep trying to use it again and again.
apk add bash
No Permission
In case you encounter another obscure message telling you
standard_init_linux.go:xxx: exec user process caused "permission denied"
check the permissions of the entrypoint script.
chmod +x entrypoint.sh
should do it on on your host. As I run my deployment using Ansible, I use a task similar to
On my way setting up a proper monitoring for my server, I just installed Logwatch to receive a daily summary of the what happened recently on the machine. I will have a look into Prometheus, Grafana, Icinga etc. later. However, for now I just wanted a quick summary of the daily “what’s going on on the machine”. Eventually, I had to fix an occur No such file or directory error.
Therefore, I decided to use Logwatch as a lightweight solution to my needs.
Installation Script
The Ansible script to install Logwatch is straight forward:
I basically set up two parameters, the e-mail as well as the detail level I want for the report. Important to know is the order Logwatch is applying your configuration settings. Following the recommendations, I did not change anything in the configuration file at
/usr/share/logwatch/default.conf/logwatch.conf
rather I decided to copy the file to
/etc/logwatch/conf/
The reason is the order, logwatch is scanning for configuration parameters in the following order. Each step actually overwrites the previous one.
/usr/share/logwatch/default.conf/*
/etc/logwatch/conf/dist.conf/*
/etc/logwatch/conf/*
The script command line arguments
Eventually, I ended up in the following error:
/etc/cron.daily/00logwatch:
/var/cache/logwatch No such file or directory at /usr/sbin/logwatch line 634.
run-parts: /etc/cron.daily/00logwatch exited with return code 2
To fix this, avoid copying the original configuration to one of the other places. I did this because I followed some recommendation I received. Instead, I now touch a new configuration file as well as setting the two parameters for MailTo= as well as Detail=. Both are s set using Ansible variables in my scripts. The additional configuration file now looks pretty boring, though:
MailTo = mail@example.org Detail = Low
You also can provide these parameters when calling the script in the cron job: Using Ansible the modification would look like the following:
I decided to change the cron job call as one never can be safe from the file changing during package updates. The same should be valid for the configuration file at its origin place.
tl;dr
Setting up Logwatch using Ansible might cause strange “No file or directory”-errors during the cron job call. This can be avoided by applying additional configuration settings at appropriate configuration locations.
While most of the prerequisites are met for my automated server setup I came across some issues when I started with my very first Ansible playbooks.
First Ansible Playbooks
First of all, I wanted to start with a quite simple ping playbook, to ensure the servers are reachable by Ansible.
# Playbook to ping all hosts
---
- hosts: all
  gather_facts: false
  tasks:
    - ping:
When I run this script I was immediately confronted with the very first error. I really love when such things happen. Nothing can motivate one more than immediate failures like the following.
FAILED! => {
"changed": false,
"module_stderr": "Shared connection to xxx.xxx.xxx.xxx closed.\r\n",
"module_stdout": "/bin/sh: 1: /usr/bin/python: not found\r\n",
"msg": "MODULE FAILURE\nSee stdout/stderr for the exact error",
"rc": 127
}
As I started with a minimal Ubuntu 18.04 LTS installation, there is simply no Python 2 installed. However, to run the Ansible tasks on the node, Python is required. I made use of the raw task in Ansible to update the package lists as well as install the package python-minimal. In addition, I added the package python2.7-apt in this bootstraper as it is needed later on. Once Python has been installed the ping playbook worked without any problems.
# Bootstrap playbook to install python 2 and python-apt
# It checks first so no unecessary apt updates are performed
---
- hosts: all
  gather_facts: False

  tasks:
  - name: install python 2
    raw: test -e /usr/bin/python || (apt -y update && apt install -y python-minimal)
  - name: install python-apt
    raw: test -e  /usr/lib/python2.7/dist-packages/apt || (apt install -y python2.7-apt)
For both packages, I test for the corresponding directories on the node to avoid unnecessary updates.
Note: When testing for a directory on the shell the following line became very handy:
At a second step, I created a maintenance playbook to update and upgrade the packages on my node.
# Playbook to update Ubuntu packages
---
- hosts: all
  gather_facts: false
  tasks:
  - name: update and upgrade apt packages
    become: true
    apt:
      upgrade: yes
      update_cache: yes
      cache_valid_time: 86400
Before including the pyhton-apt package to the bootstraper, I got the following error when dry running the playbook.
fatal: [xxx.xxx.xxx.xxx]: FAILED! => {"changed": false, "msg": "python-apt must be installed to use check mode. If run normally this module can auto-install it."}
Conclusion
While this is not any rocket science for sure, I now have a few essential scripts to bring my server to a base level I can start working with.