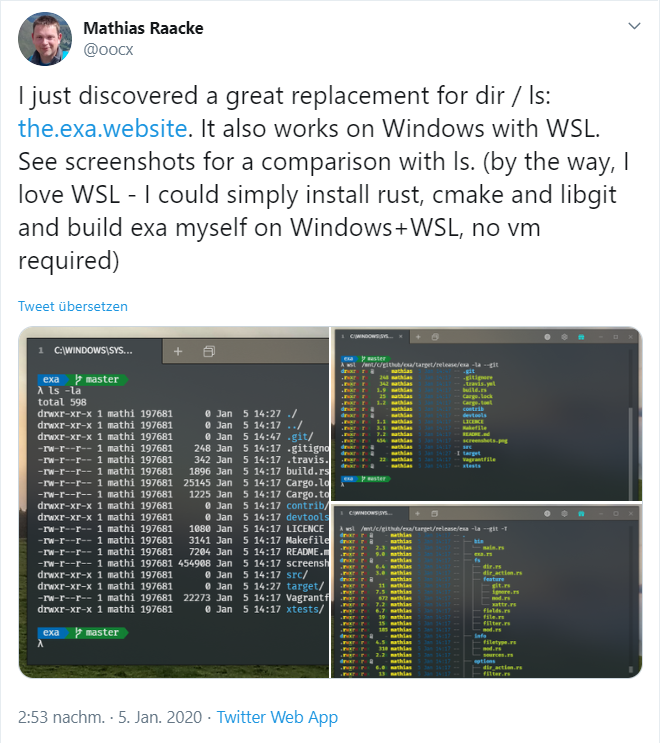
Recently, I was pointed to exa by this tweet from Mathias.
The installation is pretty easy. Unless you are using Ubuntu (as WSL) as there is no package available. But then again, compiling it by yourself is pretty straightforward as well.
1. Download and install Rust for your platform.
2. Install libgit2 and cmake.
3. To download the latest version, run: git clone https://github.com/ogham/exa.git
4. Run make install in the new directory to compile and install exa into /usr/local/bin.
As you might know, I am using Ansible to install all of my WSL instances. Eventually, things did turn out not so easy. However, two evenings later, I finished an Ansible role doing this fully automated.
Eventually, you have to set the variables for exa_dir and rust_dir to make this role working. That way, you not only get a great tool, but you also get it fully automated into your Ubuntu WSL.
If you are not happy enough just using WSL from Visual Studio Code, you can use it as an integrated shell as well.
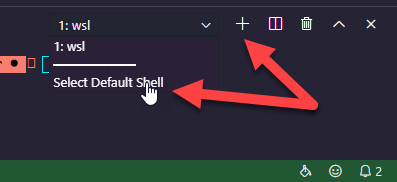
Simply open a new Terminal Window in Visual Studio Code, add a new one and select Select Default Shell.
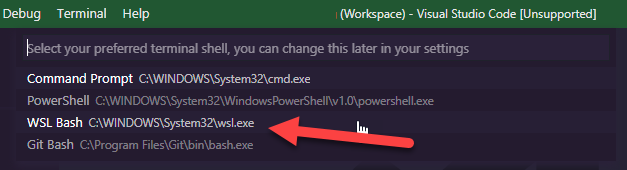
Now chose your WSL as default one.
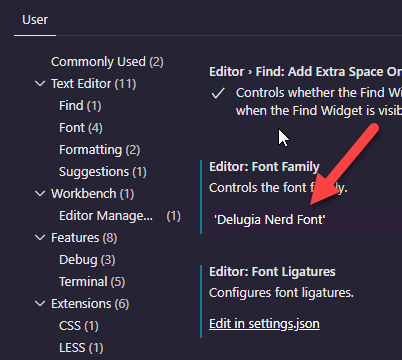
As I have installed agnoster themedoh-my-zsh using Powerline fonts, the terminal was messed up at the beginning because I was using Cascadia Code as monotyped font. While Cascadia is actually not yet fully Powerline enabled, I am currently using Delugia Nerd Font as a substitute.
All together, this is a wired “hackatory”. However, it’s quite fun, and personally, I like the result:
In case you did not know: You can use WSL (Windows Subsystem for Linux) as your shell in Visual Studio Code. This comes in very handy if you did mod the hell out of your WSL, as I did.
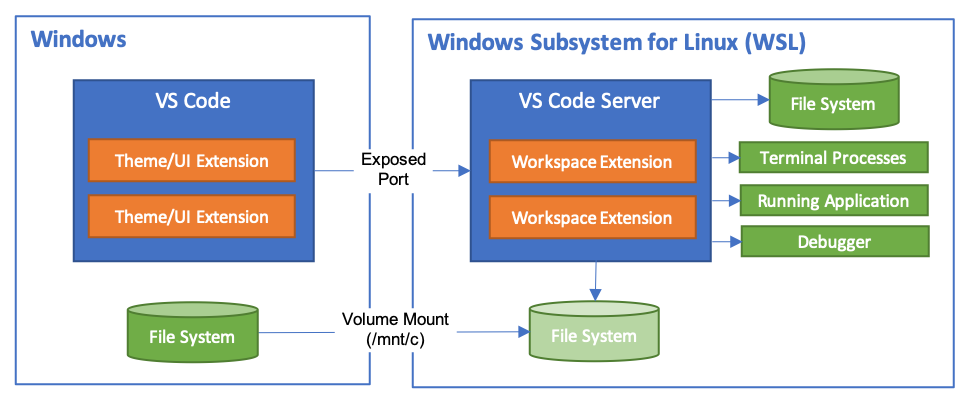
The Visual Studio Code Remote – WSL extension lets you use the Windows Subsystem for Linux (WSL) as your full-time development environment right from VS Code. You can develop in a Linux-based environment, use Linux-specific toolchains and utilities, and run and debug your Linux-based applications all from the comfort of Windows.