If you are not happy enough just using WSL from Visual Studio Code, you can use it as an integrated shell as well.
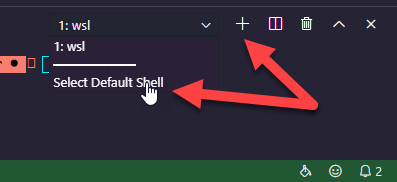
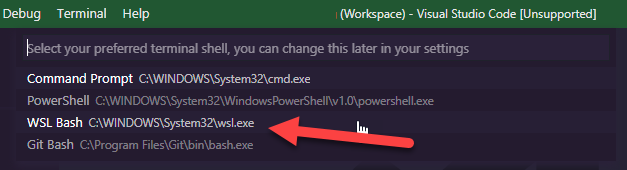
Simply open a new Terminal Window in Visual Studio Code, add a new one and select Select Default Shell.
Now chose your WSL as default one.
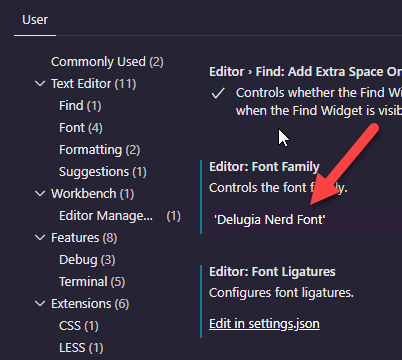
As I have installed agnoster themedoh-my-zsh using Powerline fonts, the terminal was messed up at the beginning because I was using Cascadia Code as monotyped font. While Cascadia is actually not yet fully Powerline enabled, I am currently using Delugia Nerd Font as a substitute.
All together, this is a wired “hackatory”. However, it’s quite fun, and personally, I like the result:
In case you did not know: You can use WSL (Windows Subsystem for Linux) as your shell in Visual Studio Code. This comes in very handy if you did mod the hell out of your WSL, as I did.
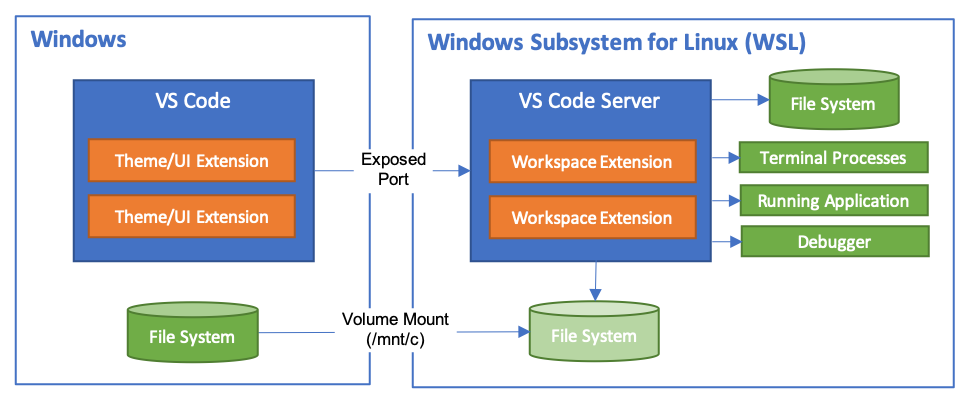
The Visual Studio Code Remote – WSL extension lets you use the Windows Subsystem for Linux (WSL) as your full-time development environment right from VS Code. You can develop in a Linux-based environment, use Linux-specific toolchains and utilities, and run and debug your Linux-based applications all from the comfort of Windows.
During today’s recording of our podcast, I talked about not getting the glow effect for the SynthWave’84 theme working. Right after doing so, I figured out how to solve the issue.
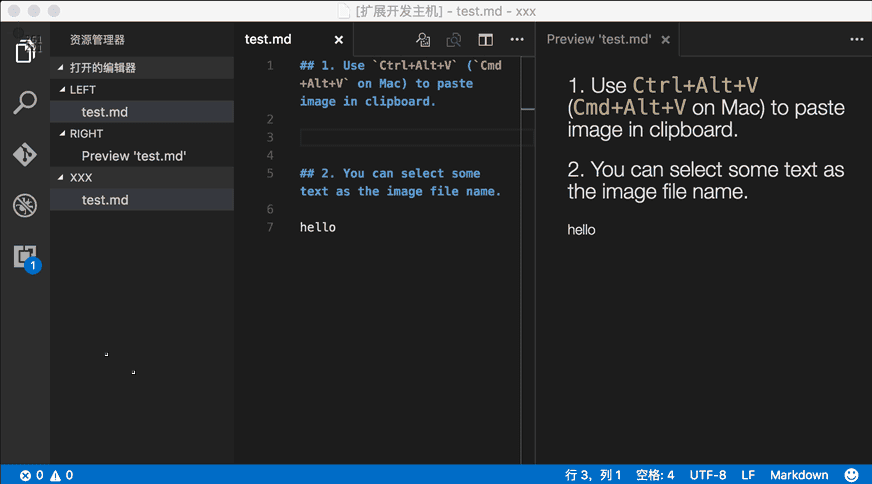
During the pre-show of our podcast, Daniel pointed me to one of his side projects, to insert inline images into Atom (as it is his favorite editor). This brought me to the idea, to optimize my very personal workflow. I write a lot in markdown and I create a lot of screenshots using Snagit. I synchronize my autosave folders across Windows and Linux and of course, I add a lot of these screenshots into the markdown documents, I write in Visual Studio Code. The later is in fact a process not sparking any joy at all.
This brought me to to the ide to check out Visual Studio Code Extensions helping me in this step. And of course, there is already such an extension: Paste Image.
Not only does it allow you to paste an image directly from the clipboard into your markdown document, but also comes with a wide range of settings, e.g. specifying where to put the images (which is one important point for me).
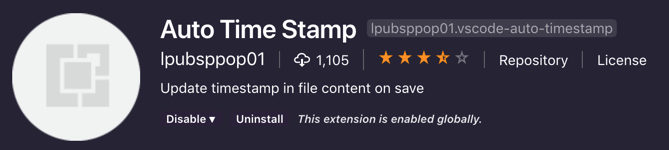
While organizing most of my information in Markdown files meanwhile, I like to have some metadata in each file to see e.g. when files have been created and/or updated.
The Auto Time Stamp extension is a small extension that doe exactly this for you. By adding Created: and/or Last modified: the extension will update these fields automatically when the file is saved.
// Created: 2018/02/04 12:24:41
// Last modified: 2018/02/09 11:41:41
This extension is going into my must-have toolbox for VS Code.
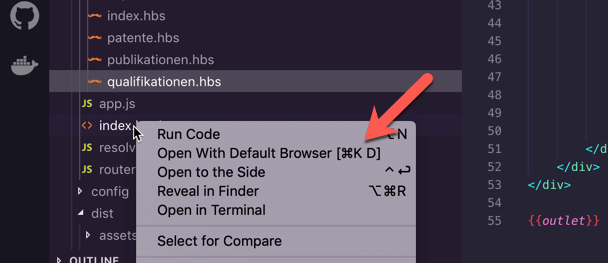
While I started using Visual Studio Code frequently for several Web development project, I got very annoyed by copying file paths and pasting them into my browser to view the file there.
Open an html file, Windows and Linux keyboard shortcut is Ctrl+Alt+O, for MacOS is Cmd+Alt+O. If you want to preview html in your default browser directly, please type Ctrl+K D.
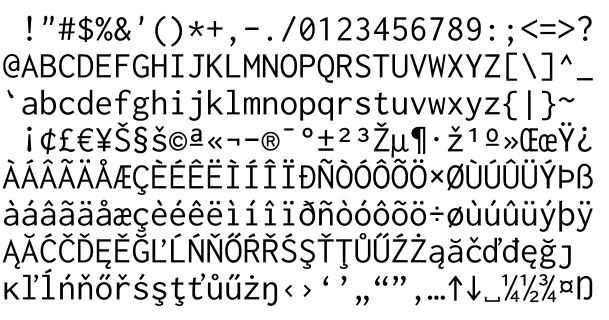
Since it was introduced in 2005, Consolas was my favourite monospaced font for development environments. More or less by an accident, I came along an article introducing Inconsolata by Raph Levien, which is a font inspired by Consolas.
Inconsolata by Ralph Levien
While it is hard for me to tell the difference out of the box, you can see quite some differences when both fonts are compared to each other.
Consolas
The differenced are subtle, the letters are tighter and look at the same time more fresh to me. Some major differences you can see at the ‘A’ or more obvious at the pound sign. Especially these differences drove me to try this font out. I started to change the font in my favorite editor, Visual Studio Code as I use it day by day.
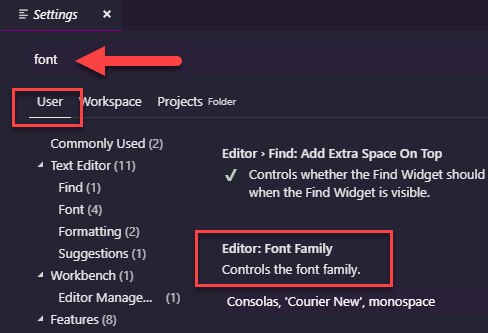
To do so, you simply open Preferences / Settings and look up for font in the User section of the settings.
Changing Fonts in Visual Studio Code
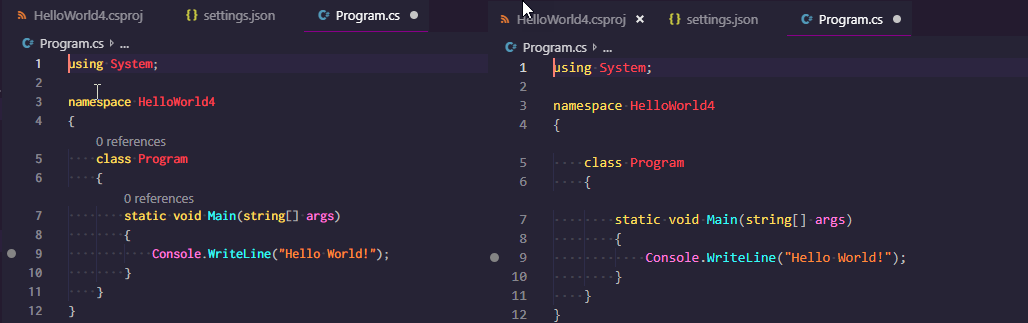
While I really like the font, it turned out that code and especially text files are much harder to read for me. You might see the differences in a side by side comparison when clicking on the image below.
Side by Side Incosolata (left) and Consolas (right)
On the left side, the text seems more squashed while Consolas on the right side appears more readable to me. In this case, both examples use a default font size of 14. The problem is, I liked the left side much more the way it looks but can work much better with the appearance on the right side.
I might stick with Consolas for quite some time, while I am looking for an alternative to use.
There are literally no good reasons to start Visual Studio Code on macOS with leveraged rights. Applications on macOS are not designed to run sudoed in general. If you would do so, this can have unintended sided effects. So much for the disclaimer.
If you want to start Visual Studio Code on macOS sudoed, just run
A Visual Studio Code extension that subtly changes the workspace color of your workspace. Ideal when you have multiple VS Code instances and you want to quickly identify which is which.
I’ll probably give it a try as VS Code is used on my machine meanwhile for almost anything I write.
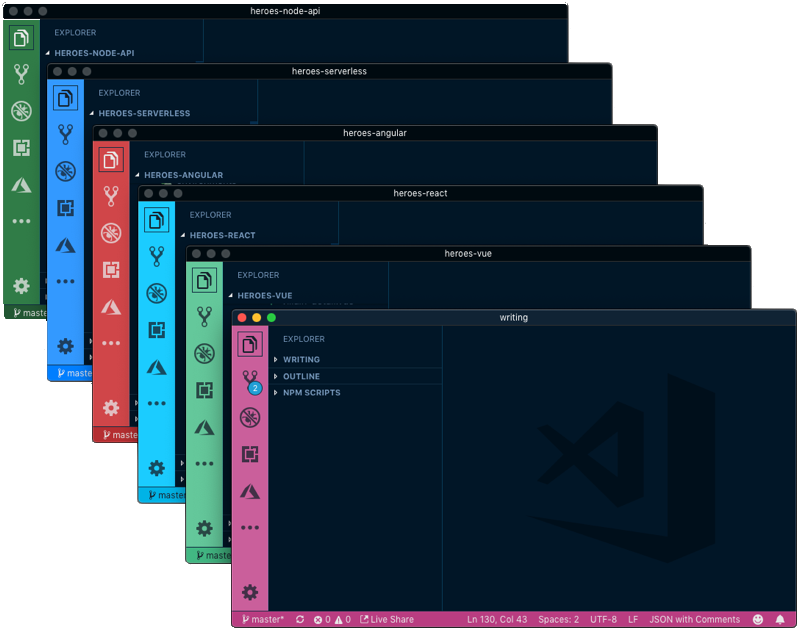
As Visual Studio Code became my main editor, I often have more than one VS Code window open. This gets confusing after some time. To keep track in which project you are currently working, I thought of using different color themes by project.
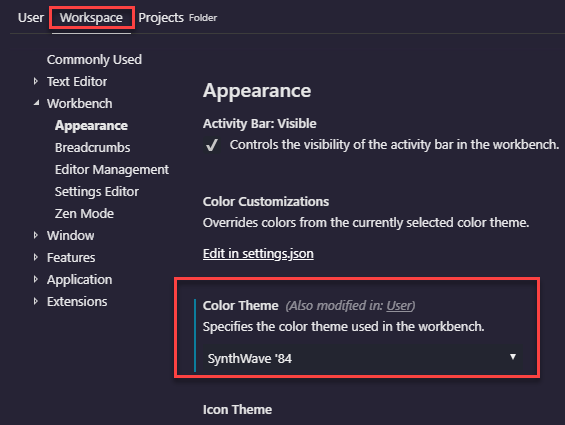
As usual, once you know the trick, this is quite easy. Navigate to File / Preferences / Settings and select the Workspace tab.
The setting for the Color Theme you choose here will be used whenever this particular folder is opened. That way you can easily distinguish between open Visual Studio Code windows.