The XBOX Blackout

After dealing with a RROD a couple of years ago, a few weeks ago, my replacement Xbox also went down to the dogs. No replacement this time. Actually, it seemed some solder joint was broken.

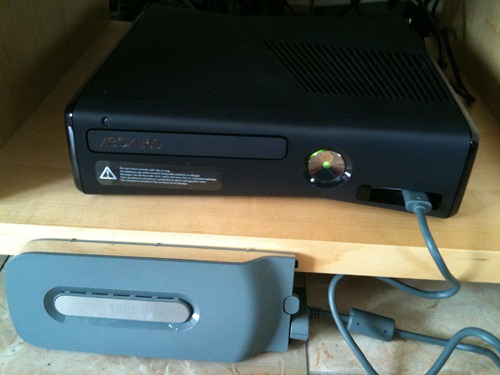
With a new box, this time a Xbox 250GB Slim, I was confronted with the data migration issue. Luckily, the new Xbox already has the drivers for the migration kit build in, which means you can connect your old HDD directly to the new box. Therefore I made use of my old Data Migration Kit.

XBOX 360 Data Migration Kit

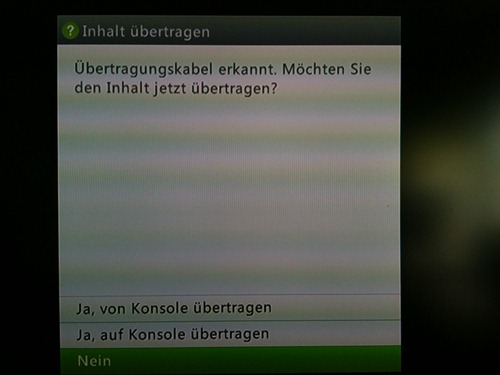
To make the process of upgrading easier, first set up your new box with a temporary account. Connect the old HDD to the Data Migration Kit and plug in the kit to the new Xbox. It will recognize the kit and ask whether to copy from or to the new console.

Copy Content to XBOX

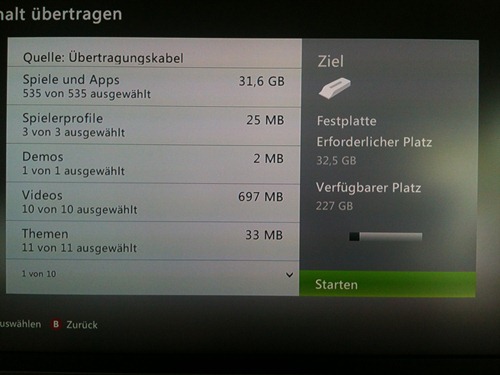
Afterwards you can select what copy. The only drawback is you cannot copy already installed games from disc. These you have to reinstall at a later point in time.

2012-08-31 14.30.19

Once started this process might take quite a while. I haven’t found anything on the Xbox site about data migration to a 250GB disc or the new boxes. However, luckily the guy in the following video pointed out how it works and that the software/drivers a re part of the new Xbox. 10 minutes worth watching.

Once accomplished, it might be necessary to transfer the rights on digital content to your new Xbox following the steps on http://www.xbx.com/drm.

O’Reilly Books on Your Finger Tips

O’Reilly’s camel book was one of the programming books, I bought quite some years ago. Since then  I am a big fan of O’Reilly books. Eventually, O’Reilly started to provide books in various digital formats. As owner of various e-book readers, I was quite pleased when O’Reilly stated to offer their books for download. Purchasing books not only from O’Reilly rather from a whole bunch of publishers, downloading, updating and copying the books from all these websites became almost  day job over time.

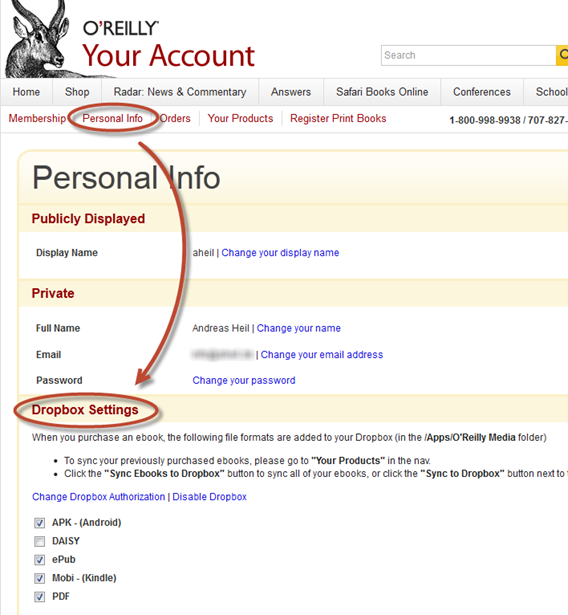
Even more, I was pleased by O’Reilly recently offering a beta service to synchronize purchased books to your Dropbox account. In your Personal Info area, you’ll find the Dropbox settings. Once authorized and the file formats selected to sync, you can start syncing your books.

O'Reilly Dropbox Settings

While newly bought books will synced automatically, previous purchased need to synchronized manually. Therefore, you’ll find a Sync to Dropbox button in the Your Products area to select which previously purchased e-books to download.

Sync to Dropbox

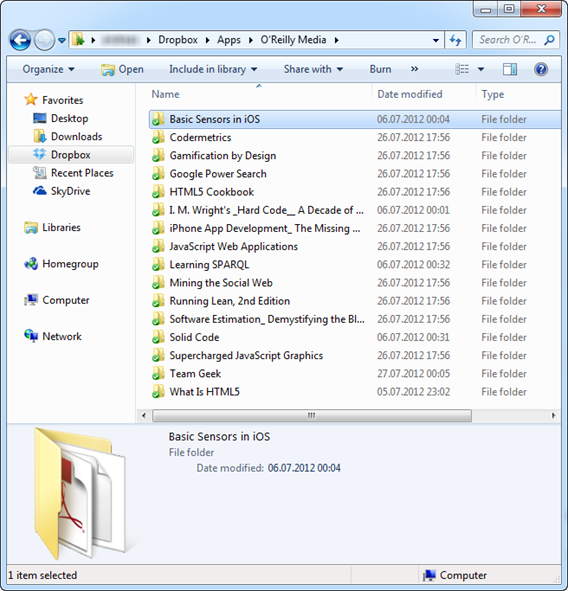
After Dropbox has finished, you have all your selected books as well as future purchases in your local Dropbox\Apps\O’Reilly Media folder. No worries if you delete one if these files, you can initiate the synchronization again as described above.

O'Reilly Media Folder in Dropbox

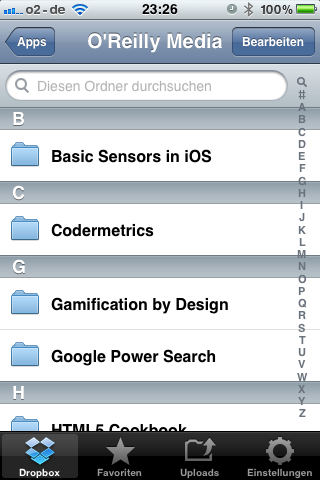
Not only that your e-books are synced to your computer, once available in Dropbox, the files are also available on all devices supported. Eventually, this means you can easily access your books on iPad, iPhone or Android devices. As Dropbox even supports Kindle Fire,  this might be a good reason to pick up this device. Based on rumors, this might be available early September. Until then, the Kindle stays the last device I have to copy my books manually. However, due to the fact they a re synced to a dedicated folder, it is easy to pick them up.

O'Reilly Media on iOS

Actually, I am that pleased with this great kind of integration, that I have asked Manning (also a publisher, I own a lot of e-books) about a similar feature. Eventually, it was confirmed that such a feature is currently being developed.

If you have no Dropbox account yet, you can support this blog by following this referrer signing up for a free account.

WordPress Internal Server Error 500 for Uploaded Images

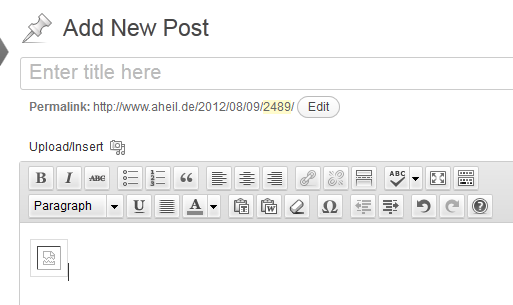
After upgrading WordPress on my Windows Server 2008 to version 3.4.1, I encountered a quite strange behavior. Using the Add New Post functionality, images, uploaded by multi-file-uploader have not been displayed anymore, neither in the editor nor in the post itself.

Add New Post Editor

Once you finished your article, your blog will end up with a Internal Server Error 500. However, all thumbnails created by WordPress can be requested without any problems.

500 - Internal Server Error Message

Eventually, I started to do some research on this issue, ending in a quite exhaustive digging down to the metal of Windows, however, with a quite surprisingly outcome. In this article I’ll try to give an overview of this issue, explaining why this occurs on Windows and how to solve this with almost a  single click.

There are quite a lot of blog entries and stackoverflow answers about this topic with more or less useful steps. If you are just looking for the quick answer, without the need of understanding what causes this particular problem, here it comes:

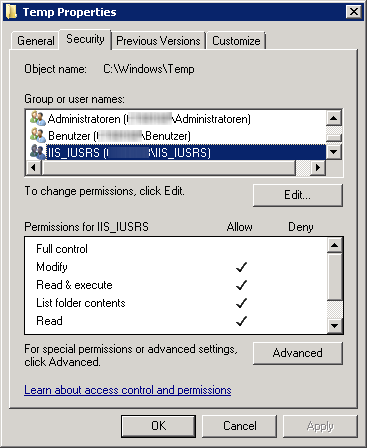
Change the system’s default temp folder (C:\Windows\temp) rights by granting rights for IIS_IUSRS user and you are probably done.

Temp Properties

The WordPress image upload is using the standard PHP functionality, using the temporary upload folder specified in your php.ini file.  By default, PHP is using the system’s temporary directory (e.g. c:\windows\temp) for uploading the initial image.

php.ini File Uploads Settings

Eventually, using the system’s temp folder is the root cause of the issue described in this article. When uploading the image to the temp folder, the file is initially created on the system. Consequently, the file is inheriting the folder’s security settings. After uploading, the original file is copied into the destination folder, e.g. \wp-content\uploads\2012\08.  Here all thumbnails are generated from the original file. As they are being created in the destination folder, they will inherit the security settings from this folder resulting in two different sets of permissions applied to the original file and the thumbnails. This explains why you will only receive an error with error code 500 for the original file, while all the thumbnails can be requested without any problems. 

In case you have already images the destination folder causing an error code 500, you can reapply the actual rights of the wp-content folder which will probably fix the problem.

In case changing the permissions of the system’s temp folder does not fix the issue, check your php.ini file if another upload folder is specified in the file uploads section. Baer in mind that PHP will use the system’s temp file for uploads also as backup in case PHP has no access rights for the folder specified in the php.ini  file. 

If you consider granting IIS_IUSRS as a security risk to access the system’s default temp folder you might want to specify an alternate upload folder anyway.

Restore Desktop Layout on Windows

Works on my machine!I continually move between different office places using different setups for monitors with my laptop. Sizes, numbers and orders of the monitors vary from place to place. As a consequence, you either deal with a complete mess on your desktop or you spend several hours per week in rearranging icons on your desktop.

Tired of doing so, I was looking for a nice tool for Windows, easy to use. Desktop Restore by Jamie O’Connell is such a tool available for Windows x86 and x64 systems and it is free to use (while he appreciate donations). For me, it works fine on a Windows 7 64-bit machine.

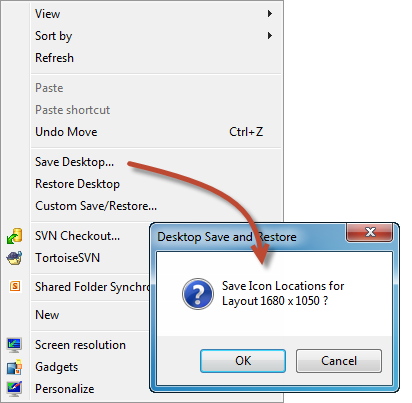
It integrates well with the Windows Explorer  context menu where you can save and restore layouts for different resolutions. This even allows you to set up your desktop for different locations and restore them with a single mouse click.

Desktop Restore

I have used it for ages, however, I have not really realized how great this tools until I set up my machine from the scratch recently. 

Understanding Average Performance Counter in .NET

For the current project I am working on, I recently had to implement a way of easy adding and using Performance Counters in .NET. While working on the code base, I implemented various counters as examples how to use the new infrastructure and how to implement counters in the code base.

While investigating in performance counters, I’ve seen quite a series of posts and articles describing the usage of the AverageTimer32 and AverageTimer64 classes. However, all the examples there seemed to be wrong. One of these examples was a question I have answered on stackoverflow.com, leading to this post.

Basically, all the examples I have seen propose to throw a set of measurements into the mentioned expecting that the counter provides the average of these measurements. The AverageTimer32/64, however, does not calculate the average of all measurements you perform. Instead it provides the ration of your measurements to the number of operations you provide.

To understand how the AverageTimer32/64 works, it might be helpful to understand the formula behind it. This also answers why one needs an AverageBase to use an AverageTimer32/64.

The formula the AverageTimer32/64 is based on is as following:

((N1 - N0) / F) / (B1 - B0)

given
N1 current reading at time t (provided to the AverageTimer32/64)
N0 reading before, at t – 1 (provided to the AverageTimer32/64)
B1 current counter at t (provided to the AverageBase)
B0 counter before, at t – 1 (provided to the AverageBase)
F Factor to calculate ticks/seconds

In a nutshell the formula takes the current time in ticks and subtracts the previous one provided. The result divided by the factor F gives you the time you operation run since the last measurement taken at t-1. Usually, this factor should be 10.000.000 ticks per second.

Now you divide this by the current base counter minus the previous base counter provided. Usually, this might be one. As a result you have the average time of your operation for a single measurement.

Using the AverageBase you now can step over various measurement points. Think of a case where you can set the counter only every tenth operation you perform. Since your last measurement you would increment the AverageTimer32/64 by the new time measurement for all ten operations while incrementing the AverageBase by ten. Eventually, you will receive the average time for one operation (even if you have measured over all ten operation calls).

In most examples, a set of timespans are provided  for this counter to calculate an average value. Let this be a series of numbers like 10, 9, 8, 7 ,6 while increasing the AverageBase by 1 every time providing one of these figures.

For the second measurement you will receive the following result:

(9 – 10) / F / (1 – 0) = -1 / F / 1

With F being 1 for simplicity you will get -1 as result. Given measurements that provide most of the time similar results, for a large number of experiments you will end up with am average value near zero.

Based on the previous example, the correct values to submit, however should be 10, 19, 27, 34, 40.  Again the same example we will show a different result.

(19 – 10) / F / (1 – 0) = 9 / F / 1

With F being 1 again, you will have an average time of 9 for your second measurement. As you can see from the formula, the every value measured needs to be greater than the previous one to avoid the effect previously showed.

You might use a global Stopwatch to achieve this goal. Instead of starting it new, you might use use Start() – not Restart() for each measurement. As seen above, the counter will calculate the difference time internally. That way you will get correct measurements.

public void Compute()
{
_stopwatch.Start(); // do not restart the Stopwatch used for average counters


// code to be measured
// ...


_stopwatch.Stop();


_avgTimeCounter.IncrementBy(_stopwatch.ElapsedMilliseconds);
_avgTimeCounterBase.Increment();
}
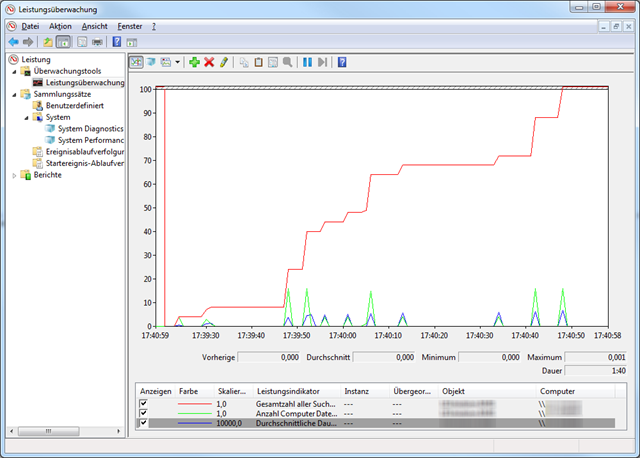
PerformanceCounterDe

Even if called AverageTimer32/64, this type of counter is not strictly restricted to time. You can think of using this counter for a variety of measurements. For example 404 responses in relation to the total number of HTTP requests,  disk transfer rations  and so on.