6-axis Mini Industrial Robot Arm

Unfortunately, I don’t have time at the moment to spend on this project. But I really want to keep this for myself in my blog: Mirobot, 6-axis Mini Industrial Robot Arm.

Inspired by the ABB IRB 6700 industrial robot arm which is utilized in advanced factories around the world, we created the Mirobot robot arm – a small, affordable, and user-friendly industrial robotic arm that is accessible to everyone. Whether you are a robot expert, creative enthusiast or beginner, you can get started in the exciting world of robotics with Mirobot.

It’s currently a Kickstarter project, already funded. The robot will probably be available at a retail price of less than 1.000 €. The Kickstarter early backer price is even about less than 400 $.

If you want to know what I plan to do with it: Skip to 3:15 in the video below. I want to run a GoPro through my my sons Lego… what else.

Kickstrter project: https://www.kickstarter.com/projects/mirobot/mirobot-6-axis-mini-industrial-robot-arm

The Missing Gadget – USB Charging Port at Microsoft Surface AC Adapter

I currently work in a clean desk office space. Every evening, I pick up everything belonging to me beside the monitors. Every morning I come, I prepare the desk. Putting my laptop there, attaching the power plug, the monitors and so on.

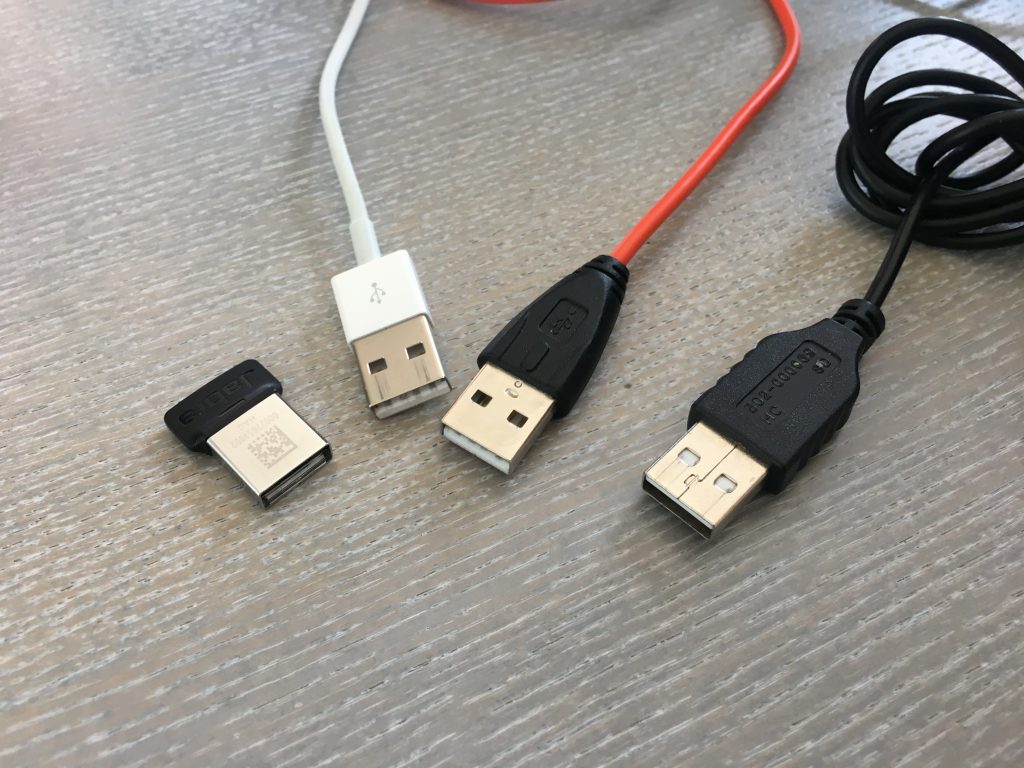
Every morning I get all my devices out of my bag. And every morning I see the same picture.

My daily USB conneectors

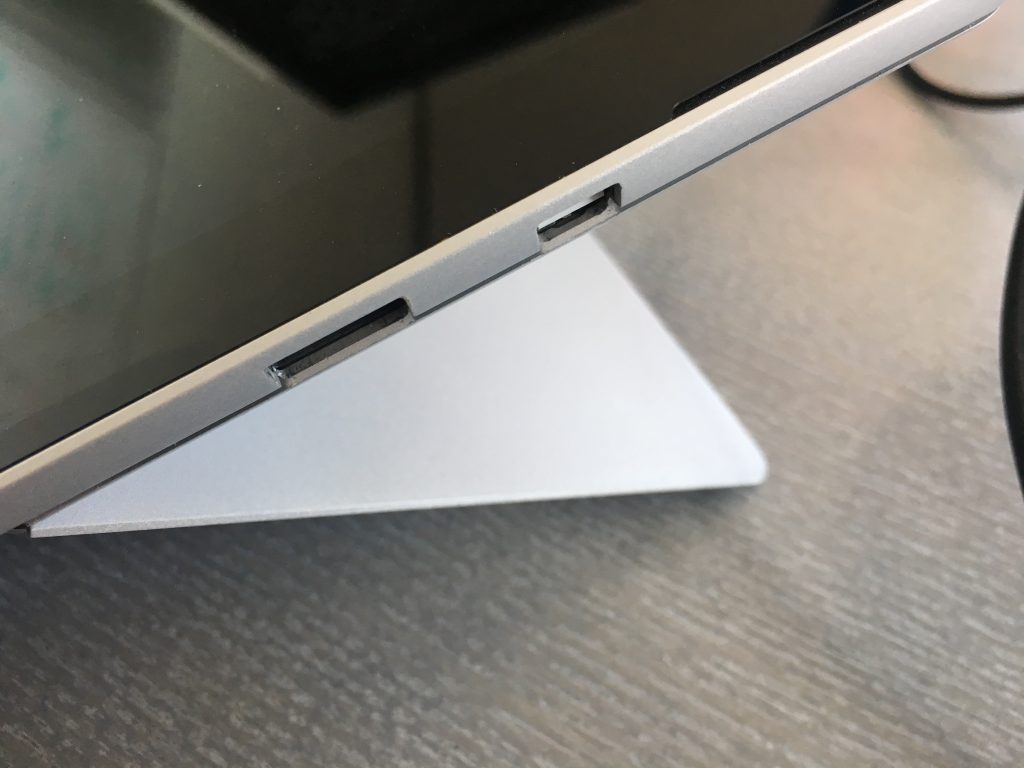
And here begins the fun. I currently use a Microsoft Surface Pro – and while I truly love this device and it’s functionality, the USB capabilities are a major drawback. Similar to my MacBook which only provides one USB-C port, the Surface only has one standard USB port.

Microsoft Surface with only one USB port

Most of the devices I can switch based on the particular need (at the desk, in the meeting). However, most of the time, the USB port is occupied to load my mobile devices. Headphones, phone, one more phone, battery pack need to be charged during the day.

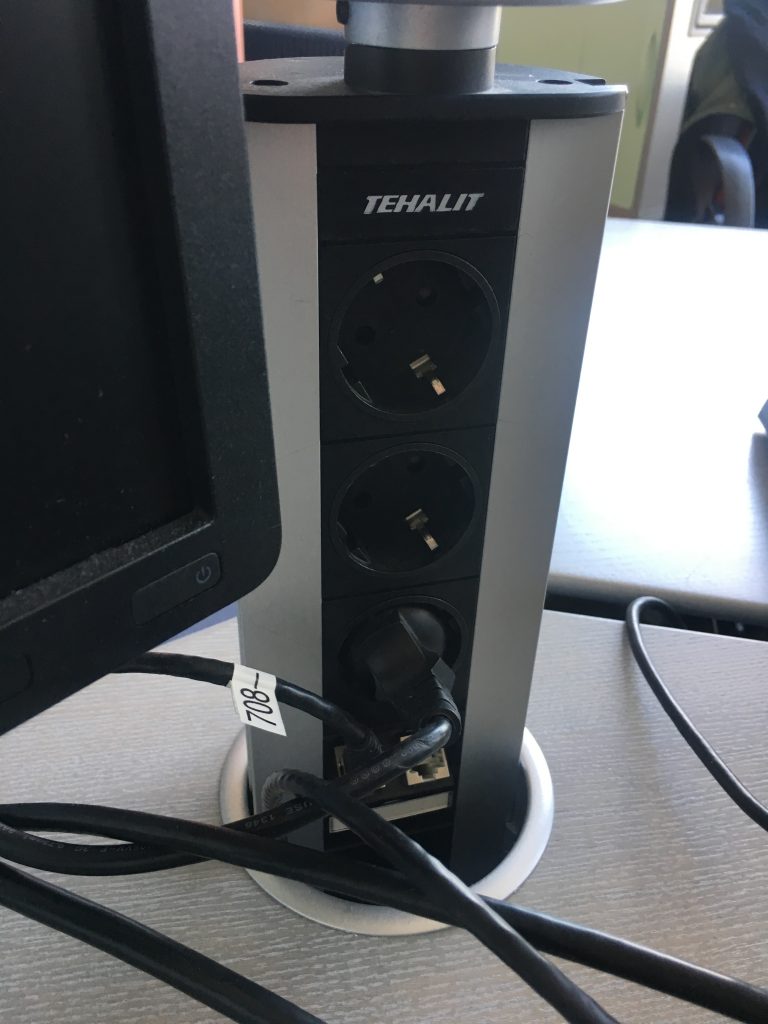
Why are USB power outlets on workplaces not a standard, nowadays? On my desk I find power outlets and netport ports. However, no possibility to charge my USB devices. Maybe you have this already on your working space, but here, we don’t have it.

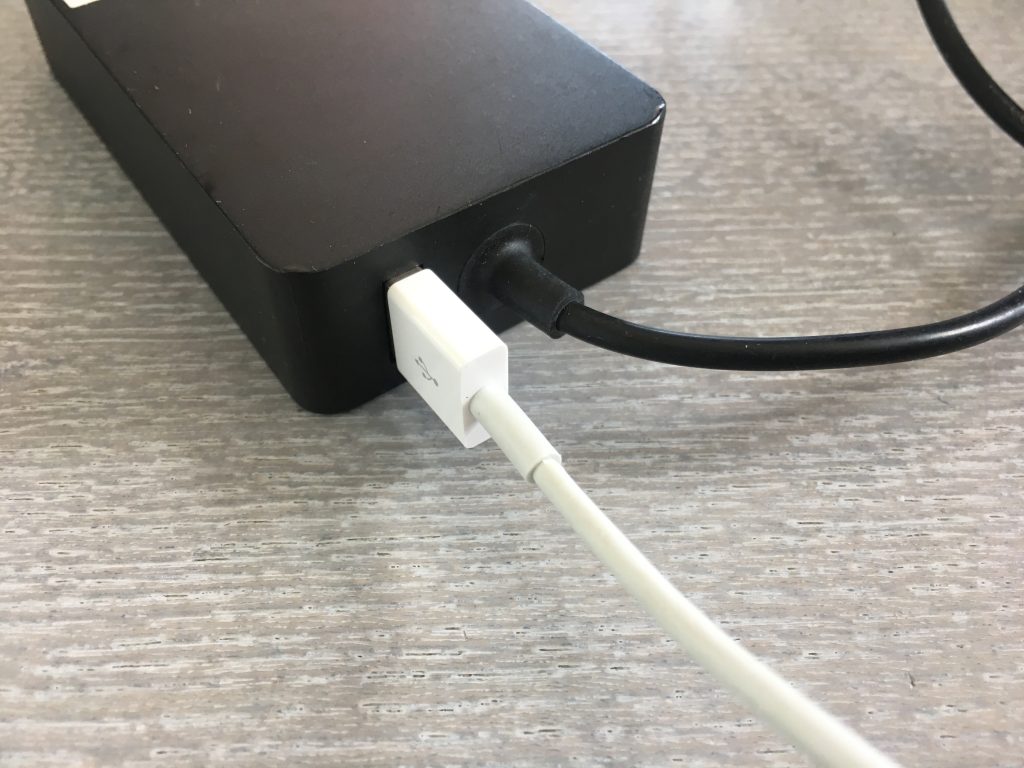
Eventually, Microsoft Surface AC adapter comes with a very simple solution . It provides a USB power outlet allowing you to charge your devices without the need to occupy one (or the one) USB port of your laptop.

This solution is just obvious and practical. I wonder why this is not a standard on AC adapters meanwhile. I hope to see this more often in the future.

Do not forget about your Crosscable when updating an EZControl XS1

No SEO friendly title in my mind, there was nothing better to describe tonight’s uproar while upgrading some part of my home automation environment.

I don’t always change a running system. But when I do, I break it for sure. And of course, when I change something, I always change literally everything at once.

While following some rules strictly during my work day, such as

  • never change a running system ,
  • change one thing at a time and
  • don’t use beta software in a production environment

I definitely forget about those rules once I am at home. Therefore, I fiddle around with my home WiFi for days, upgrading everything to IEEE 802.11n including a new full duplex repeater and new access points with exotic chipsets requiring very specific build of DD-WRT.

Still debugging slow pings, lags and randomly missing segments of my network, I also decided to upgrade my EZControl XS1 to the very latest available (beta) firmware.

Once I shut down the device in its bootloader mode, and tried to uploaded the latest firmware (via browser), the HTTP request failed and every single browser on any OS told me the page wasn’t able to be displayed. Once back to the bootloader, it told me the uploaded firmware check failed. Hitting the browsers refresh button did not help a lot either. That’s the way how you brick a $300 gadget in seconds like a boss.

Crossover CableAs anybody would do in such a moment, I dug into my box with long forgotten network cables and picked the very only crossover cable probably exiting within the range of two hours driving. Hail to me, still owning one.

No kidding, most of todays kids won’t even know such a thing did exist. Actually, it’s the sort of cable one used long time before wireless. Before the age of switches, routers and hubs at a time when one tried to connect to machines via ethernet directly.

Connected to the XS1 via the crossover cable, there is absolutely no problem uploading the firmware. When performing the same operation via wireless, there goes something wrong in layer 2 or 3 or maybe 4 – or not. We eventually will never know.
Next time you are going to upgrade the firmware of any device via network, keep your crosscable in reach, you are probably going to need it.
Next time, I won’t change a running system, always change one thing at a time and I will never use betas in production environment… I don’t think so.

openHAB EZControl Integration

For quite a time, I monitored the openHAB project. Eventually, I found some time to test it out and tried to set up some of my existing home automation hardware with openHAB.

Therefore, I decided to set up my EZControl XS1 as a very first testbed.

Learning it the Hard Way

Before digging into the details, I’d like to share some of my experience during my very first hours with openHAB.

First of all, the contributors (currently counting 38) have done a great job in documenting the project. Installation and configuration does work quite well. The same for the basic setup of the development environment (e.g. in the case you want to implement an own binding).

Unfortunately, there are many details you need to know to get the system up and running, not being offered at a glance. You have to dig into groups, the wiki, demo files and perform a lot of trying, experience a lot of frustrating errors. Once you figured out how it works, it is not hard to remember. Done once, some of the issues are that simple, that it is clear why they are not mentioned in the wiki at all. Unfortunately, if you haven’t dealt with openHAB before, you have to learn it the hard way.

Not to forget, here’s a list of sources you definitely need to check in case you stuck with your very first setup:

Definitely, do not miss the last one. Many of your questions will be answered in the examples wiki, though. Still, some details might be missing, but that’s the place to check first.

Said that, there’s no critics about the documentation. It’s great, you just see it’s written by those who implemented it. And as such, one sometimes forgets about the trivial bits and bytes one need to know to start.

Setting up the EZControl XS1

Most devices I run on my EZControl are sensors from the ELV FHZ 1×00 System and intertechno wireless receivers.

For my convenience, I uploaded the configuration app to my internal web server though.

XS1 Setup

For now, I am only interested in the sensors available at the sensors tab.
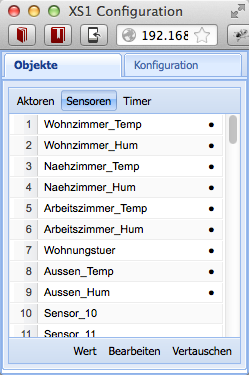
Sensors

Iwanted to be independent from the data structure to set up the XS1 with openHAB. Therefore, the only thing you need to know, is how you named the sensors, though.

Switches

Before starting, make sure the HTTP binding is installed as it is used both, for switches as well as for sensors.

To address switches, you can use the REST interface of the XS and address the switches directly, you simply need to know the number of the switch being used within the query parameters such as number=2 within your *.items configuration file..

Switch Switch_Balcony_gBalcony "Balkon" (gBalcony) {http=">[ON:GET:http://192.168.0.242/control?cmd=set_state_actuator&number=2&function=1] >[OFF:GET:http://192.168.0.242/control?cmd=set_state_actuator&number=2&function=2]" }

Sensors

Sensors can be fetched from the ES1 using HTTP binding as well. Therefore, I pick up the XML output from the ESZ, in my case provided at http://192.168.0.242/xml.
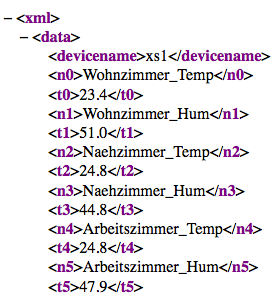
XS1 XML

To pick a corresponding value of a sensor, I’ve created a XSL transformation

<?xml version="1.0" encoding="UTF-8" standalone="no"?>
<xsl:stylesheet xmlns:xsl="http://www.w3.org/1999/XSL/Transform" version="1.0">
    <xsl:output indent="yes" method="xml" encoding="UTF-8" omit-xml-declaration="yes"/>
    <xsl:template match="/">
        <xsl:value-of select="xml/data/*[text()='Arbeitszimmer_Temp']/following-sibling::node()"/>
    </xsl:template>
</xsl:stylesheet>

The XSL is quite simple, picking up he value from the next node after the node with the given sensor name. That way, structural changes in the XS1 setup or even a replacement of a sensor do not affect the openHAB configuration.

Create a XSL for each sensor value, you plan to use within openHAB and place them into the transform folder under configurations in the openHAB folder structure.

XSLT Transformations

Again in the *.items configuration file, using the HTTP binding, I pick up the XML for each node and apply the transformation provided, resulting in a single value.

Number Temp_gOffice "Temperatur [%.1f °C]" (gOffice) { http="%lt;[http://192.168.0.242/xml:10000:XSLT(Arbeitszimmer_Temp.xsl)]"}
Number Hum_gOffice "Feuchtigkeit [%.1f %%]" (gOffice) { http="<[http://192.168.0.242/xml:10000:XSLT(Arbeitszimmer_Hum.xsl)]"}

While this works quite well, the XML is fetched from the XS1 for each value node. Looking forward for version 1.3 of openHAB, there is planned to provide a cache, so the XML would be fetched only once while the binding would fetch the data from the cache.

Sensor Values using the HTTP Binding

Done once, adding new sensors or switched using the XS1 takes just a few minutes. Changing the .*items configuration by adding new HTP bindings, copying and modifying the XSLT and adding of course adding the sensors and switches to the XS1.

Early 2011 MacBook Pro RAM Upgrade

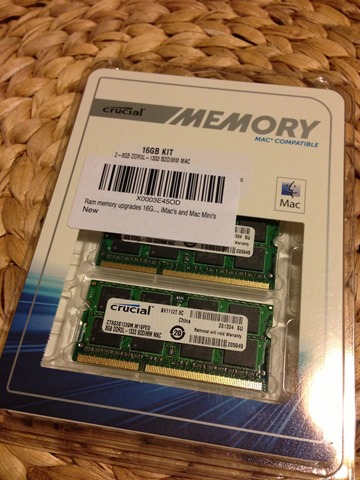
Since working more more in virtual machines and processing large amounts of data, I was looking to upgrade the memory of my early 2011 15” MacBook Pro currently utilizing 4GB of RAM. After digging through hardware specs and various manufacturer site, I decided to pick a 16GB kit from Crucial.

CT3327367 Crucial 16 GB Memory Upgrade

The specs of the memory chosen are 

  • Part Number CT3327367
  • Module Size: 16GB kit (8GBx2)
  • Package: 204-pin SODIMM
  •  DDR3 PC3-10600
  • CL=9
  • Unbuffered
  • NON-ECC
  • DDR3-1333
  • 1.35V
  • 1024Meg x 64

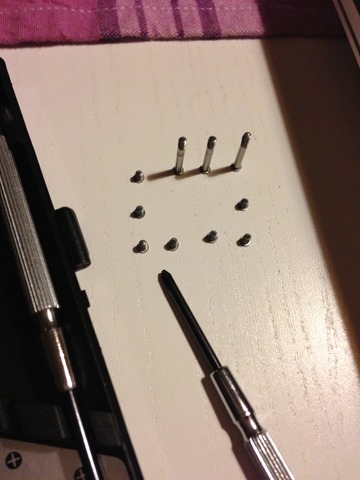
The only thing you need is a Phillips #0 screwdriver to remove the bottom of the MacBook.

Phillips #0 screwdriver for MacBook Pro

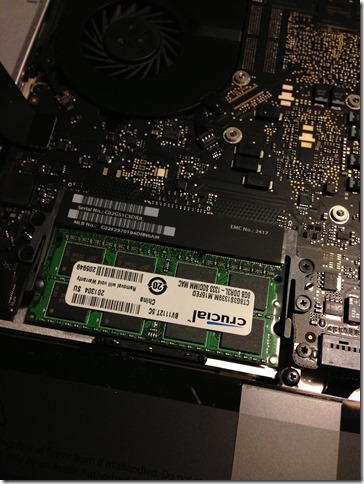
Old memory out, new in is pretty easy, both modules are on top of each other.

Crucial Memory Upgrade CT3327367

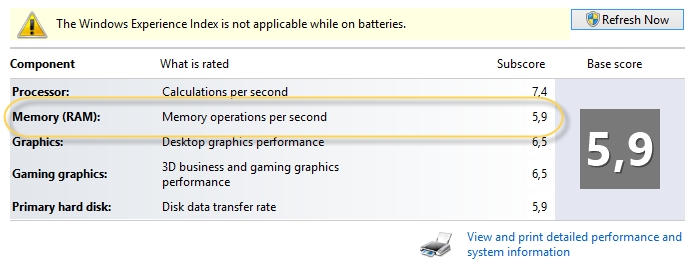
Once upgraded, I had to check the Windows Experience Index, if the new memory did change anything considering the performance, Actually the subscore for the memory went up from 5,9 to 7,6.

Windows Experience Index before memory upgrade

PerIndexNew

While I bought the MacBook, more than 4 GB was not a requirement. In addition the model is officially supported by Apple only up to 8 GB of RAM. However, the hardware can handle 16GB which now just comes in quite handy.

Halo – Luminous Gadget

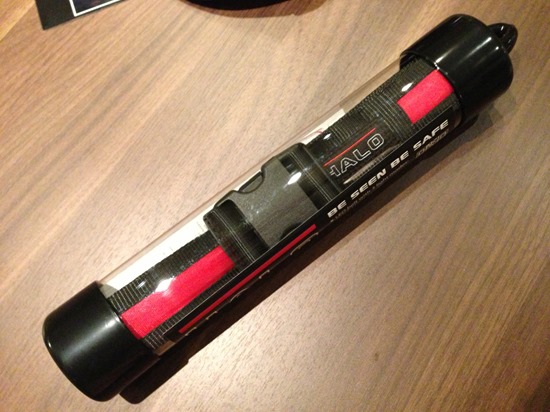
Another successful project, I backed on Kickstarter this year, was the Halo LED safety belt, meanwhile available from Halo Belt Company. Some days ago, I received my reward: one of the first Halo belts manufactured.

Halo LED Belt

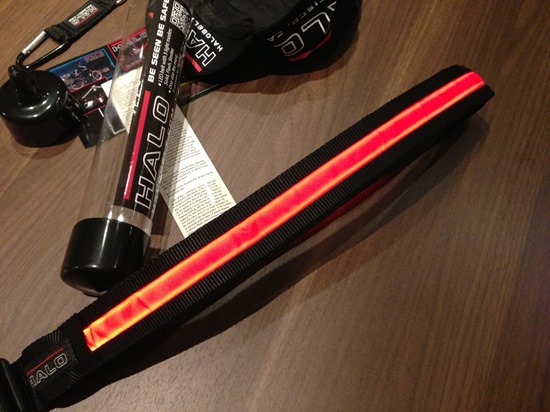
The makers of the halo belt put quite some effort to make the pledgers smile. The reward included a key chain, a cap, handwritten post card and an additional replacement battery. The belt uses a single CR2025 battery inserted into the belt buckle. One battery charge is supposed to last about 20 hours of continuous glowing.

We do use the belt now for roughly two weeks about one hour a day and we haven’t realized any loss in the luminosity, yet. The fabric the belt is made of is of an excellent quality and the light distribution within the fabric is equal on every inch.

Halo Belt Reward Content

The backers of the project received quite a bunch of stuff with their reward.

Halo Belt Extras

Most surprisingly, Vincent and his team put a handwritten note into the package. In fact this means they wrote about 500 cards to the project backers.

Handwritten Notes from Halo Belt

We’ve been that overwhelmed by the quality of the belt, we ordered a second one (different color) straight from the online store of the new start-up.

MacBook Pro’s Bluetooth Gone Fishin’

Today, I spend literally hours in trying to fix a hardware problem on my MacBook Pro as the Bluetooth suddenly went fishing without saying anything to me. Said that, I run Apple’s Booot Camp with Mountain Lion and Windows 7 which makes troubleshooting sometimes easier, sometimes harder. As I turned on my MacBook Pro this morning my Microsoft Wireless Notebook Presenter Mouse 8000 (great device but a way too long name) mouse was – let’s say – working but not working. Left and right button and mouse movements worked fine but the mouse wheel as well as the middle button did not work at all. I followed some simple debugging rules from David Agan’s book Debugging The 9 Indispensable Rules for Finding Even the Most Elusive Software and Hardware Problems how to analyze faults in systems.

For the Impatient Ones

Jump to the very end of this article, do not learn anything, do not improve your analytic skill by one but see how to fix it.

Check The Plug

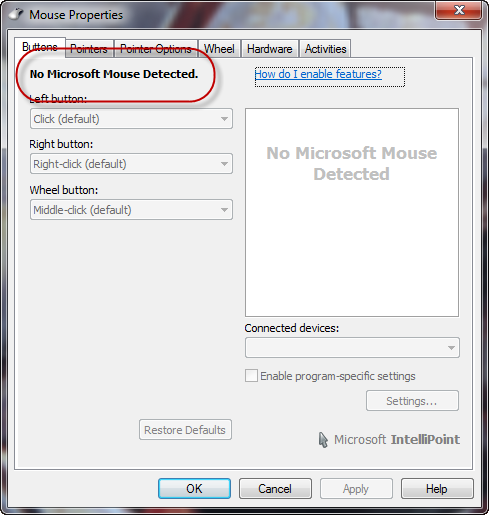
First, I checked the Microsoft IntelliPoint software (Still working? Latest version?) and it said there is no Microsoft Mouse connected.

No Microsoft Mouse Detected

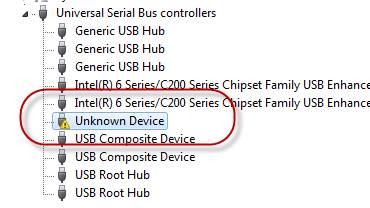
Next step, I checked Windows Device Manager telling me here is a unknown device. Maybe Windows did not know, but I was pretty sure the device Windows did not want to know anymore today was the MacBook Pro’s Bluetooth chip.

Unknown Device

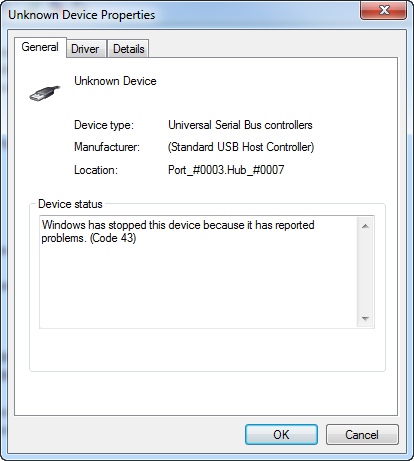
I checked the device properties and found that

“Windows has stopped this device because it has reported
problems. (Code 43)”

What kind of problems, you’ll probably never known.

Unknown Device Properties

If you dig a bit you’ll probably come along the TechNet entry for Error Code 43 saying

“A device driver notified the operating system that the device failed.”

With some years of experience in this kind of business, I tried of course

  • kicking the laptop (most of the time works quite fine with other people’s hardware)
  • rebooting several times
  • un- and re-installing the device drivers
  • running Windows’s Hardware and Device troubleshooting

Make it Fail

As nothing worked out for me, I rebooted into OS X to figure out if the device fails here as well and found a similar situation – Bluetooth went into its weekend saying

“Bluetooth: Not Available”

Eventually, that’s no driver issue, that’s definitely a hardware problem. One machine, two operating systems, different drivers (well module in OS X) resulting in a similar failure. Saturday noon and a not that satisfying Apple Store density in Germany, there is little one could do before next Monday. Hardware dies; usually at the most unpleasant moment you can imagine and nothing you can do about that.

Bluetooth: Not Available

Get a Fresh View

I did not follow the debugging rules in their given order, but I always try to keep the rule Get a Fresh View in mind. Often one is biased by some ideas in ones mind, some posts read while doing research or personal previous experience.

Eventually, I remembered what I have learned about power cycles during studies and realized that rebooting nowadays is not a hard reset of your machine anymore – there have been times (I do still remember) when PCs provided a (at least by me frequently used) reset button causing the device to hard reboot by turning the power of and on again.

So what’s the difference by rebooting the laptop several times, or booting into another OS? Right, this is no cold start and probably all devices keep their previous (faulty) state even after the reboot. As a consequence, plug out the power source, turn of the machine – leave it for a few seconds and turn it on again. Bluetooth is up and running again for both, Windows and Mac OS.

A Pi’s Home

A few weeks ago, I ordered my very personal Raspberry Pi. I ordered mine with element14 from the UK. Actually element14 is Farnell, which in turn is well known in the UK. In fact, we ordered many times with Farnell during my time at Microsoft Research in Cambridge when we needed sensors and stuff for our projects.

The Case

I also picked a case for 6 Euro from RS Components which is available in white, black and sort of transparent plastic.

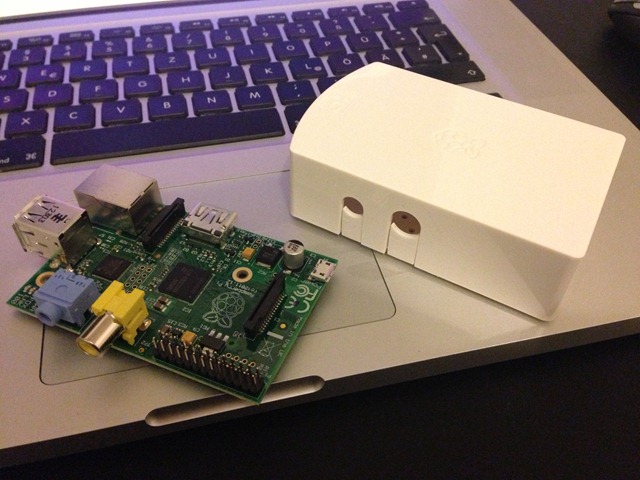
Raspberry Pi and Case

The board firs perfectly into the case, even with a little bit of fiddling. To fit the board into the bottom part of the case you need to bend the circuit board quite a bit so it moves under the clips.

Fitted Board

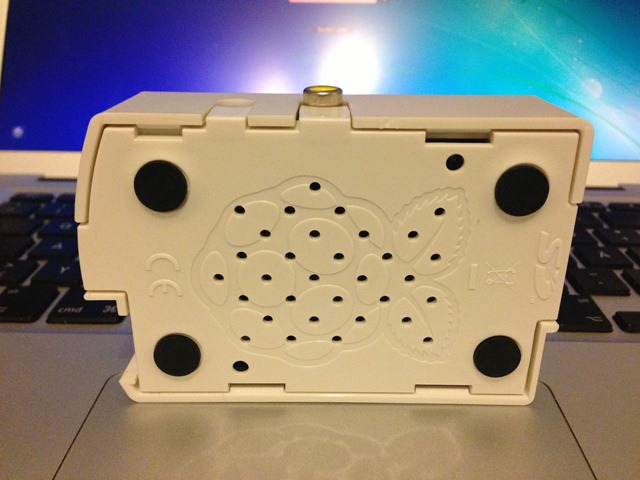
At bottom side the case provides quite good rubber stands with a quite good friction. Even with all the cables in the Raspberry Pi, the case should be relatively stable – considering the weight.

Raspberry Pi Case Bottom

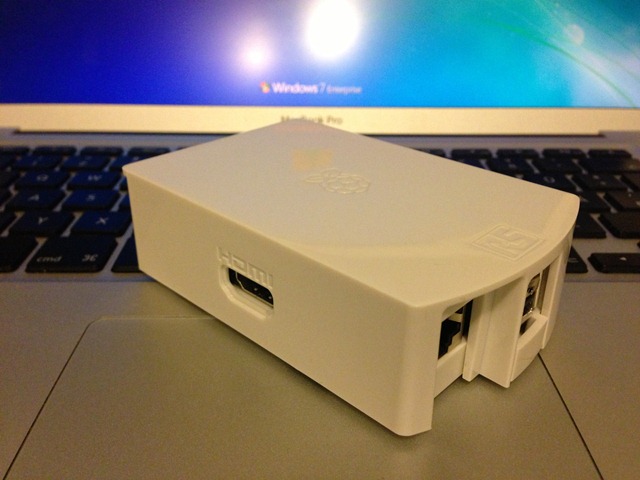
Once assembled, the case look pretty nice – all ports and slots easily accessible.

Assembled Raspberry Pi Case

Still working through the Raspberry Pi’s possibilities, it now looks at least much more like  something you can put on your desk.

iPhone 5 Battery Review

Almost three weeks after receiving the new iPhone 5, I wanted to write a few words about the battery life of the new iPhone. If you check out the Apple support forums, you might find thousands of people complaining about the battery drain of the new iPhone.

Also you find dozens of tricks how to extend the battery life by turning off all kind of features (which make the phone interesting  in the fist place).

Battery Life Now

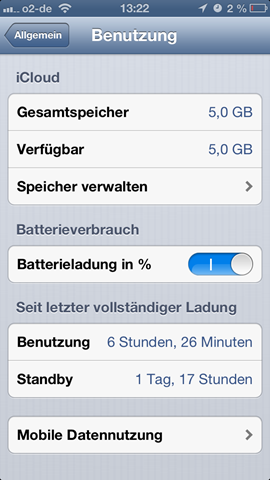
iPhone 5 Battery LifeAfter three weeks, I have an average usage similar to the following screen:

Given six and a half hours of usage and 41 hours of standby, I have to charge my phone every seconds day, which is similar to my previous iPhone 3GS and iPhone 4/4s I am aware of.

To Lithium Ion or Nothium Ion

I did not turn of any features and I did not re-install my phone from the scratch. I restored my iPhone 3GS backup and kept all the settings. I have turned on WiFi all the time and most of the time I use Bluetooth as well. Also 3G is turned on all the time. I have some calls and write several text messages during the day, but I do not switch the phone of during night (but do use the new do not disturb mode). I check Facebook and Mails a lot during the day, read tweets on a regular base and check in as often as I can using foursquare.

When I used the phone during the first few days, the battery did no last longer than eight hours (i.e. the phone turned of before a working day was over). I “calibrated” the battery in letting it drain completely and loading it up to 100% several times – which is a very questionable technique considering the underlying technology.

The lithium ion technology is a quite clean technology. There shouldn’t be any learning effect on the battery, the first charge should be as the 20th and fully draining the battery should not affect its overall capacity.  One of the few drawbacks of lithium ion batteries might be their complete failure after two or three years.

The last then percent of the battery drain quickly when being used, however, after the first three weeks the battery seems to be fine. Alexander Olma run some tests on the phone with extensive traffic usage resulting in 3h non-stop downloading bits and bytes until the phone turned off.

Due to the lack of data for comparison (i.e. data I can access), I can’t say whether there are other smartphones out in the wild with extensive longer battery life than the iPhone 5. However, a fully charged phone can make its way through a normal business day and a nice evening while still waking you up the next morning.