The McGyver GIT Survival Guide

Working with version control system is one of the elementary skills for each and every software engineer. Over the years, I worked with CVS, Subversion, SourceSafe, Perforce as well as Mercurial. Within Microsoft, I worked a lot with Source Deport and Microsoft Team Foundation Server. At home I run my dedicated SVN repository. In fact, I don’t feel comfortable when not being able to check in source code at all.

For my personal projects, Git especially Github works quite well, however, since the openHAB project moved from Google Code (Mercurial) to GitHub, I deal with quite a lot of issues within Git over and over. Currently we have more than 50 60 forks and more than frequent pull requests. Therefore, keeping your local branch permanently in sync is quite inevitable.

Abstraction None
The worst thing about Git is the fact, the user interface and console commands seem to reflect the Git implementation bit by bit. Personally, I have the feeling there is zero abstraction for the user. Even worse, when used to non distributed systems like SVN or TFS doing simple syncs and commits, the concepts behind Git might drive one mad.

Small Steps
This seems obvious, however, try to make only small commits to the repository. The more collaborators you have, the more challenging it might become to merge. At the same time, the less experienced you are with Git, the smaller your checkins should be. Commit single files, minor changes as isolated as possible. This will make you life just so much easier.

Daily Routine Conflicts
As daily routine, fetching and merging the local branch should be done via

git fetch upstream
git merge upstream/master

Usually, this should work quite well unless there are changes on local files that should not be merged at all or you have done changes not to be merged yet.

Updating e21a751..349468b
error: Your local changes to the following files would be overwritten by merge:
        foo/bar/buzz.ext
Please, commit your changes or stash them before you can merge.
Aborting

To just avoid the merge stash the changes via

git stash

Do the merge, and than pull the stash.

git stash pop

Again, usually this should work fine unless the merge results in a conflict which cannot be resolved automatically.

Auto-merging foo/bar/buzz.ext
CONFLICT (content): Merge conflict in foo/bar/buzz.ext

Simply run

git mergetool

to solve the issues and try to pull the stash again.

Delete from Repository only
To remove a file from the repository whilst keeping it locally just performa a

git rm --cached myfile.c

Bear in kind, this git will realise this file immediately as a new. rm works on folders as well, though. Anyway, this will become very handy once you accidentally check in files that are not intended to be checked in.

Backup early – Backup often
Just in case you don’t know what’s going to happen e.g. due to a larger refactoring – move the current state into a new brach as backup right after a commit

git branch my-backup-work

Reset to Remote
Ok, this one gave me quite a hard time, as I had changes checked in my forks but needed to reset particular files to the current revision of the original repository (not your local branch and neither your fork).

To do so, reset your working copy to the upstream master:

git remote update
git reset --hard upstream/master

Afterwards push this new branch-head to your origin repository, ignoring the fact that it won’t be a fast-forward:

git push origin +master

you might have something like

Fetching origin
Fetching upstream
remote: Counting objects: 685, done.
remote: Compressing objects: 100% (336/336), done.
remote: Total 507 (delta 249), reused 321 (delta 87)
Receiving objects: 100% (507/507), 6.57 MiB | 146.00 KiB/s, done.
Resolving deltas: 100% (249/249), completed with 64 local objects.
From https://github.com/aheil/example
   f55f8b0..e060456  master     -> upstream/master
macbook-pro:example andreas$

Reverting to a specific Revision
This one is easy, you simply need to tell git the hash of the revision you want to check out. This works quite well, however, you always need to consider the visibility of the branch you want to check out. To understand the reachability in git, you might want to read this article.

git checkout e095 -- somefolder/somefile

Conclusion
In my very personal opinion, Git is s**t if you are used to centralised repositories. If you worked a lot with Mercurial, Git is simply to complex. Git is not abstract enough. When working on code, I want spend 99% on the code and 1% on the revisioning system, not the other way around. When working on the open source projects, I currently waste a major part of my time on Git.

I probably will never setup and run a personal git server (I do run a SVN server and did run CVS before) and I probably will not maintain any Git servers (I did at work maintain Microsoft TFS, SVN and CVS servers, though).

Git is great when it comes to some kind of mass collaboration (but I haven’t found anything so far Mercurial won’t offer for the same purpose). While everybody plays nicely together, it works just great.

As there is much more to learn about Git, you eventually want to pick Pro Git to get some insights.

sa-update

SpamAssassinFor quite a while my SpamAssassin installation for Windows won’t update anymore. It simply quit with some exit code 4. Unfortunately, SpamAssassin is running on this server for quite some time and often one simply forgets about systems that are up and running until they fail. Having a closer look at the error message it appeared that sa-update had some problems with some of the preconfigured channels.
C:\SpamAssassin>sa-update.exe -v --nogpg --channelfile UpdateChannels.txt
channel: no 'mirrors.khop-bl.sa.khopesh.com' record found, channel failed
channel: no 'mirrors.khop-general.sa.khopesh.com' record found, channel failed
channel: no 'mirrors.khop-sc-neighbors.sa.khopesh.com' record found, channel failed
Update failed, exiting with code 4

C:\SpamAssassin>if NOT EXIST .\share\3.003001\updates_spamassassin_org.cf EXIT /B 1

A look at the sa-update documentation reveals there might be a problem with downloading and extracting the updates.

An exit code of 4 or higher, indicates that errors occurred while attempting to download and extract updates.

As the sa-update.bat refers to a file called updatechannels.txt you probably find the failing channel entries there.

# see http://khopesh.com/wiki/Anti-spam#sa-update_channels
# for more information

updates.spamassassin.org
khop-bl.sa.khopesh.com
khop-general.sa.khopesh.com
khop-sc-neighbors.sa.khopesh.com

Digging a little bit deeper showed that the channels provided by Adam Katz at http://www.khopesh.com/ became unmaintained. Therefore, the easiest way to get rid of the failures is to remove the entries from the file for good. Eventually, this will leave you with only the official channel at updates.spamassasin.org.

Where is my Space

Using Bootcamp, running a Mac OS X and a Windows installation in parallel, space is slowly but constantly running low on my MacBook Pro. Before upgrading my HDD, I was looking for a better way than using du or df -h to check where I might free up some space on my disk.

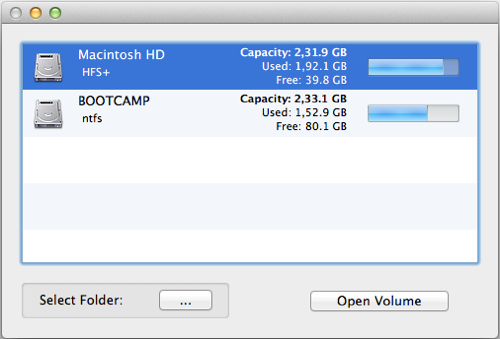
Disk Inventory X is a free tool available using cushion tree maps to visualise the disk usage. A similar tool was developed at the Technical University of Eindhoven named SequoiaView. While SequiaView was developed for Windows, Disk Inventory X is designed for Mac OS, working fine with version 10.8.3.

Disk Invetory X

After selecting the disk, it’s possible to browse through the directory structure analysing where your storage when to.

Disk Invetory X Cushion Tree

Both, SequoiaView for Windows and Disk Inventory X for Mac are quite useful programs that should be definitely part of ones toolset.

Confluence Math Formula Macro

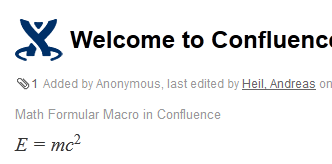
As we are dealing quite a lot with mathematics in our current development and using Atlassian’s Confluence as our documentation system, we were looking for a elegant way to document our mathematics in any better way than E=mc^2.

We found the Math Formula macro originally written and tested against Confluence version 3.5, not playing well with the latest Confluence version, we are using.

After following the installation steps there it was, the incompatibility note:

“There are user macros without any metadata configured in their template. They have been highlighted below. For these macros to be available for use in content they require parameter information. See the Guide to User Macro Templates.”

Check out the highlighted macros, and click Edit.

Installed User Macros

In the Template field add the following as the very first line of the template:

## @param size:title=Font Size|type=int|default=150|desc=Font size for formulas in percentage

Within the template, the the font size is referred as $paramsize, however, in the metadata description you denote the param just as size.

Once these changes are made, you can use the macro to create your formulas…

Math Formular Macro


Handbrake Xbox 360 Streaming Error 69-C00D10E0

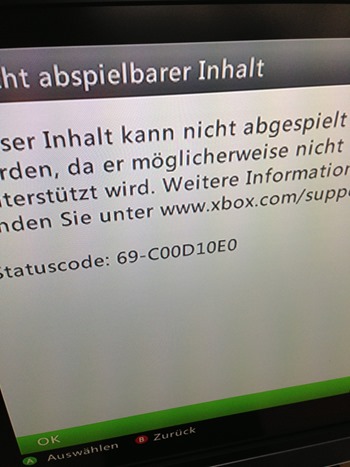
Recently, I started to convert some of my old media files using Handbrake to be streamed using a TwonkyMedia Server to my Xbox 360. After converting some of the files, I realized my Xbox won’t play the files due to a status code 69-C00D10E0:  

Statuscode: 69-C00D10E0

The Xbox support forum provides an entry exactly for this issue, however, the information given there is not quite helpful. That’s what they say (to be honest, that’s what I already had in mind):

Error code 69-c00D10E0 is preceded by the following message:

Unplayable Content
Status Code: 69-c00D10E0

Problem

If you’re seeing this message and error code, it means that the file is too large for streaming, the file may be corrupted, or the codec needed to play the file is missing.

More helpful would be a list of supported video and audio codecs, a list of not supported combinations or similar. Therefore, I had to dig somewhat deeper and to figure out how to work around this issue.

Choosing the Right Preset

I used a earlier version of Handbrake before, providing a dedicated Xbox preset. Version 0.9.8 of Handbrake does not provide such an default preset anymore. Instead you can chose Normal or High Profile from the Regular section for playback with Xbox 360.

Handbrake Presets

Normal should work fine with he Xbox 360 System Player. If you are looking for a better video quality, choose the High Profile, though. Using High Profile, by default, the checkbox for Large file size is enabled. Eventually, that’s the problem, Xbox 360 System Player cannot play the streamed file as files generated with this flag contain 64-bit pointers, allowing a file size larger than 4GB, which the player simply cannot deal with. Therefore, just uncheck this one to generate Xbox 360 System Player compatible files.

Lage file size disabled

Choosing the Right Audio Track Order

Another issue with the Xbox 360 Player is its inability to let you choose the audio track to play. I was wondering quite a while, why some encoded videos where played using the wrong audio track and – even worse – Xbox does not let you choose another track.

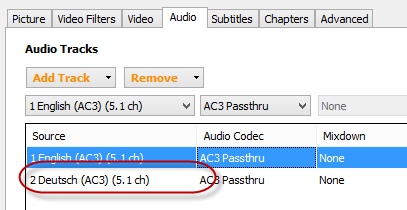
After some trial and error, I figured out, Xbox is playing the last track in the list of audio tracks encoded by Handbrake. You maybe haven’t realize this at all as native speaker only interested in the English track anyway.

Audio Tracks order

Eventually, the secret how to use Handbrake to encode media files or you Xbox is to put the audio track you want to play on Xbox System Player on the very bottom of the list.

Keeping these two settings, you generate perfectly streamable media files to be played with Xbox 360’s System Player.

Pixeur Color Picker

For quite a time, Pixeur became one of the tools I almost can’t work without anymore. It is a lightweight and free color picker provided by Veign.

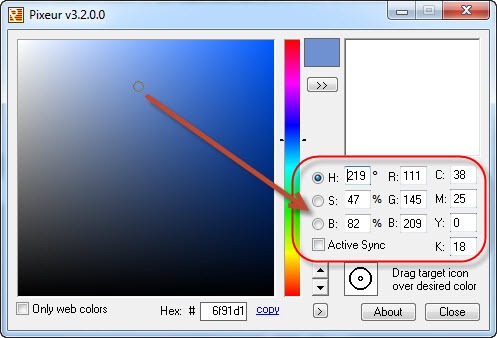
First of all, it’s easy to pick a color from the standard color palette. A great feature is the automated calculation of HSB, RGB and CMYK and Hex (the numbers used in HTML code) values. Which value you ever need, Pixeur does calculate the corresponding color codes. 

Pixeur Color Picker 

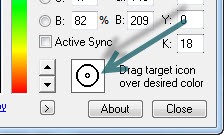
The ultimate uber feature is the screen picker tool. You simply drag and drop the pointer to the pixel on your screen you want to know the color code from.

Screen Color Picker

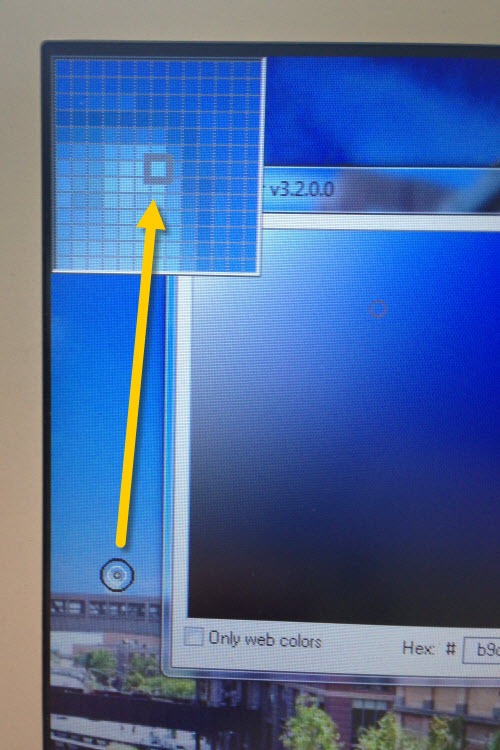
Drag and drop the target icon to whatever pixel on your screen to get the exact color value. In addition a zoomed area of the hovered are is shown in the corner of your screen which makes it quite easy to pin down a single pixel even on some kind of retina like displays.

Picking a single pixel with Pixeur

It’s very simple to use and so far I haven’t had any issues with the tool. Amazingly, the tool worked since ever on various Windows versions I used so far including Vista and windows 7 without the need of updating.

Pro:

  • easy to use
  • low footprint (~2MB)
  • provides color values in various formats
  • screen wide color picker
  • zoom of the hovered area when picking a color
  • free (i.e. no money, cash, PayPal or diamonds needed)

Contra:

  • Hard to find on the web

The tool is so great, I usually forget about it until I need to get a color code or pick some pixel’s color from the screen. It’s one of the first tools I install after setting up a new machine, and there’s the problem – if you don’t know where to find it, it’s hell of a job to find the download site.

There are probably a dozen of similar tools out in the wild, and each and every major drawing program probably provides such features. However, as a free, and very easy to use alternative, give it a try.

O’Reilly Books on Your Finger Tips

O’Reilly’s camel book was one of the programming books, I bought quite some years ago. Since then  I am a big fan of O’Reilly books. Eventually, O’Reilly started to provide books in various digital formats. As owner of various e-book readers, I was quite pleased when O’Reilly stated to offer their books for download. Purchasing books not only from O’Reilly rather from a whole bunch of publishers, downloading, updating and copying the books from all these websites became almost  day job over time.

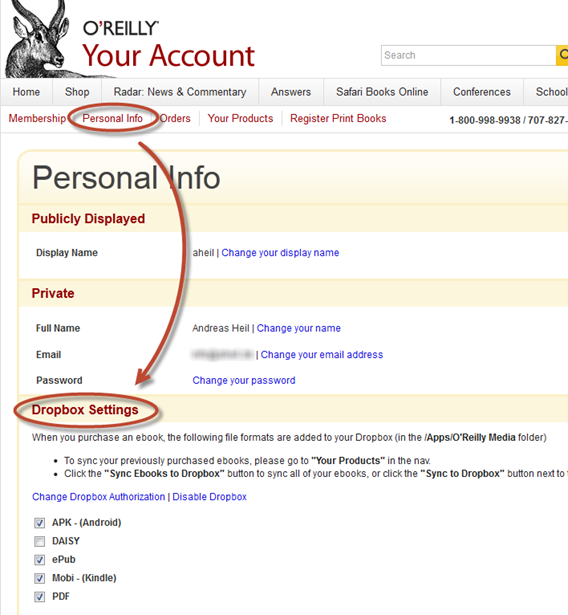
Even more, I was pleased by O’Reilly recently offering a beta service to synchronize purchased books to your Dropbox account. In your Personal Info area, you’ll find the Dropbox settings. Once authorized and the file formats selected to sync, you can start syncing your books.

O'Reilly Dropbox Settings

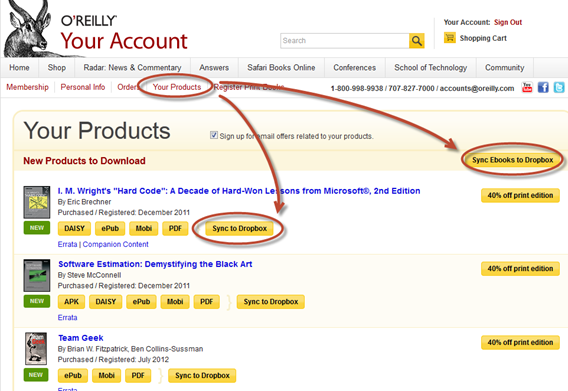
While newly bought books will synced automatically, previous purchased need to synchronized manually. Therefore, you’ll find a Sync to Dropbox button in the Your Products area to select which previously purchased e-books to download.

Sync to Dropbox

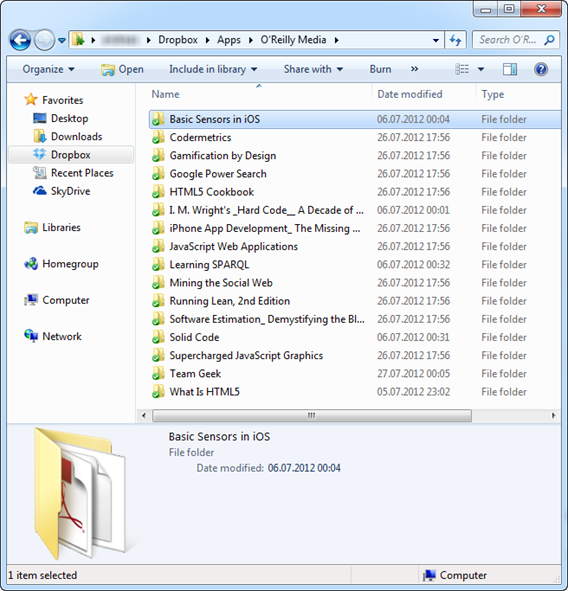
After Dropbox has finished, you have all your selected books as well as future purchases in your local Dropbox\Apps\O’Reilly Media folder. No worries if you delete one if these files, you can initiate the synchronization again as described above.

O'Reilly Media Folder in Dropbox

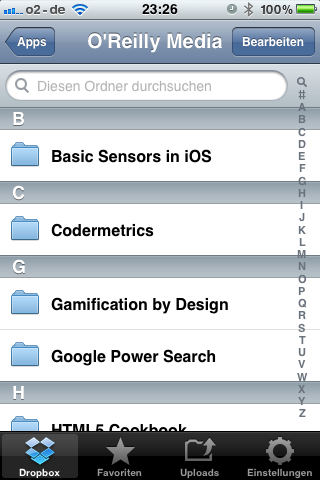
Not only that your e-books are synced to your computer, once available in Dropbox, the files are also available on all devices supported. Eventually, this means you can easily access your books on iPad, iPhone or Android devices. As Dropbox even supports Kindle Fire,  this might be a good reason to pick up this device. Based on rumors, this might be available early September. Until then, the Kindle stays the last device I have to copy my books manually. However, due to the fact they a re synced to a dedicated folder, it is easy to pick them up.

O'Reilly Media on iOS

Actually, I am that pleased with this great kind of integration, that I have asked Manning (also a publisher, I own a lot of e-books) about a similar feature. Eventually, it was confirmed that such a feature is currently being developed.

If you have no Dropbox account yet, you can support this blog by following this referrer signing up for a free account.

Restore Desktop Layout on Windows

Works on my machine!I continually move between different office places using different setups for monitors with my laptop. Sizes, numbers and orders of the monitors vary from place to place. As a consequence, you either deal with a complete mess on your desktop or you spend several hours per week in rearranging icons on your desktop.
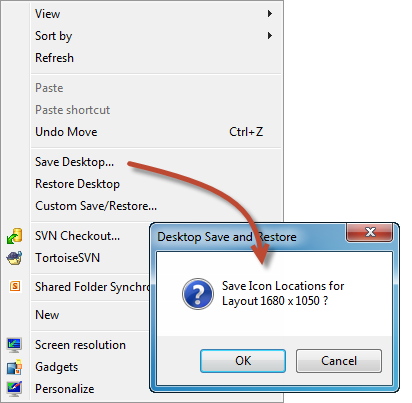
Tired of doing so, I was looking for a nice tool for Windows, easy to use. Desktop Restore by Jamie O’Connell is such a tool available for Windows x86 and x64 systems and it is free to use (while he appreciate donations). For me, it works fine on a Windows 7 64-bit machine.

It integrates well with the Windows Explorer  context menu where you can save and restore layouts for different resolutions. This even allows you to set up your desktop for different locations and restore them with a single mouse click.

Desktop Restore

I have used it for ages, however, I have not really realized how great this tools until I set up my machine from the scratch recently. 

Windows Metafile Preview on Windows 7

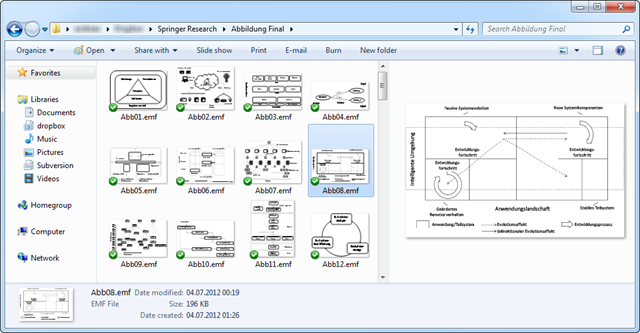
Works on my machine!The visual preview of files in Windows Explorer is one of the great features of Windows when looking for a certain file. Unfortunately, with Windows Vista Microsoft disabled the preview for Windows Metafile Format (.WMF) and Enhanced Metafile Format (.EMF) files. As I needed t work a lot with EMF files during my latest book project with Springer, I was looking for some way to enable the preview of the file types mentioned above in Windows Explorer.

Windows 7 without EMF/WMF preview

Fortunately, there is a great plugin called emfplugin written by Daniel Gehringer to enable the preview. The plugin is available for x32 and x64 machines and should work on both, Windows Vista and Windows 7. Once installed (and rebooted) the Windows Explorer is capable of displaying EMF and WMF files.

Windows Explorer EMF and WMF thumbnail preview plug-in

The plugin is licensed under the MIT license, so its safe to go with it. At the very end this raises the question why Microsoft did actually disable the preview for two formats developed by Microsoft itself and whether they might work with Windows 8 again.

Restoring NT Backups using Windows 7

After a recent data loss, I had to restore several backups from various sources. Unfortunately, some of these backups were made on a Windows Server 2003 machine. However, it seems that Windows 7 does not come with any possibility to restore these backups out of the box, though.

The Windows NT Backup – Restore Utility seems to be the solution for this issue. During installation you might get the notification to turn on Removable Storage Management – on Windows Vista.

Enable Removable Storage Management Dialog

However, this is one of the features not available in Windows 7 anymore. Fortunately, Microsoft did release another version of this tool for Windows 7. Even the tool itself is now called Windows NT Backup Restore Utility for Windows 7 and for Windows Server 2008 R2 you will find it only as Update for Windows 7 x64-based Systems (KB974674) on the Web – of course this would be the exactly what you are going to look for, yes?

Once downloaded the right bits and installed, you will see the familiar UI of the former backup tool.

Windows NT Backup Restore Utility for Windows 7 and for Windows Server 2008 R2

Simply follow the Restore Wizard to access your old backups.